Prefix/Suffix and Narratives
Prefix and Suffix are available per Branch or Network, as well as per Document. Supervisors/Managers will set these up in both the Branch and Tables. See CCTE Finance User Guide.
As per the Table for Narratives below, these can be set up for Domestic, International, Trans Tasman and Sundry.
They are set up with a Code and by
- Service Type
- Sales Code
- Whether Required, Recommended or Optional – if * asterisk applies, these Narratives are Mandatory and cannot be removed. A “Required” Narrative will be automatically attached to a document and cannot be unchecked. To populate the “Recommended” or “Optional” narratives select the “Add Recommended/Optional Narratives” option which is now available on the individual document’s screen.
- Document Types can be selected for Narratives to apply to
- Heading can be switched on or Off
- Can specify if the Narrative is to be set up as a Header or Footer
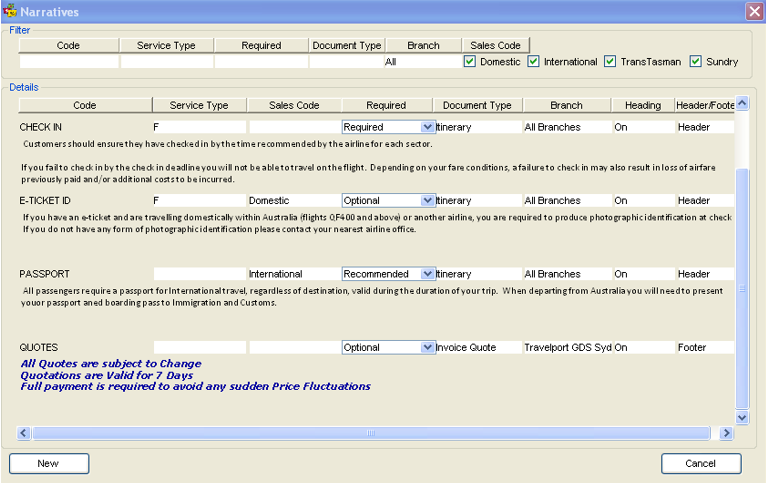
Once the Narratives are set up for respective Document Type/s when the Document is produced, a screen will appear showing this narrative and it can be selected to add to a Document.
Additionally Narratives functionality has been extended to include additional documents.
Add and format Narratives is available in the following CCTE documents:
- Proforma Invoice from Quote
- Proforma Tax Invoice
- Proforma Credit Note from Quote
- Proforma Tax Credit Note
- Credit Note
- Credit Note Quote
- Invoice
- Invoice Quote
- CCCF Receipt
- Receipt
- Fee Nett Receipt
- CCCF Refund
- Refund to Passenger
- Debtor CCCF Statement
- Debtor Open Item Statement
- Debtor Balance Brought Forward
- Debtor Receipt
- Refund to Debtor
- Company Statement documents
- Hotel Commission Reminder
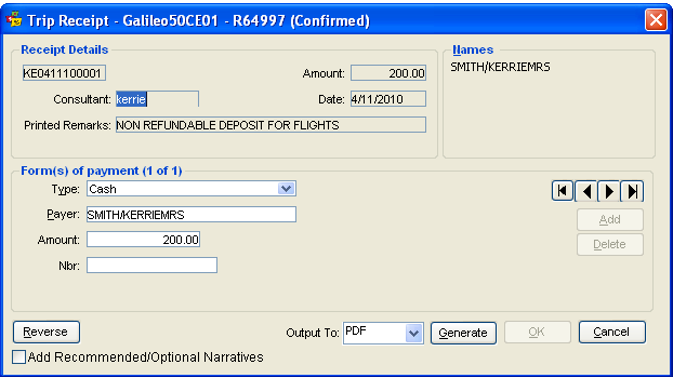
Example Retail Receipt
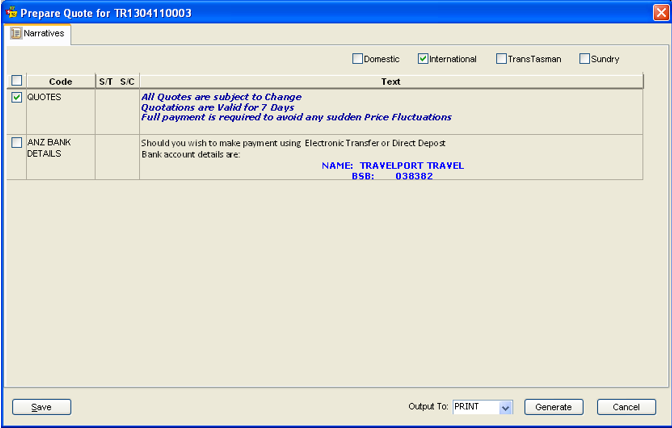
Select the Checkbox titled Add Recommended/Optional Narratives and then click the Generate button the Narratives screen will open to enable selection of the Recommended or Optional Narratives.
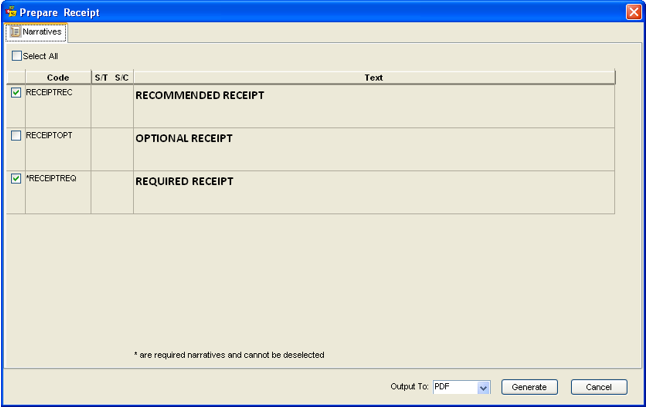
In the above screen:
- Required, Recommended will be checked by default and Optional narratives will be unchecked. The user can check/uncheck the Recommended and Optional narratives as required for the document
- Double clicking a narrative will open the New/Edit Narrative screen
- The user should click the Generate button on the screen to generate the document
Once the narratives are selected, the Output To field should be chosen and then the Generate button clicked.
If selecting the email option, the below screen will appear and you need to select the e-mail addresses to whom you want to send the email. In the list, all the email addresses with send level will appear in the list. These are pulled from the Phone field in the Trip/Client/Debtor/Creditor modules. If no email addresses have been loaded into the phone field, an error will appear asking you to add one.
Click on the email addresses in the list that you are sending the email to.
Email from Branch Email ID means that the email address setup in the Branch tab of the Supervisor login will show as the sent from address once the client has received the email.
Copy to Consultant means that a copy of the email will be sent to the consultant email address entered in the Consultant ID in the Supervisor login.
Email Address box allows the agent to add in other email addresses that may not have been loaded in the phone field.
Email Subject is automatically generated and will show the document type, agency name, passenger name and departure date. This line can be modified.
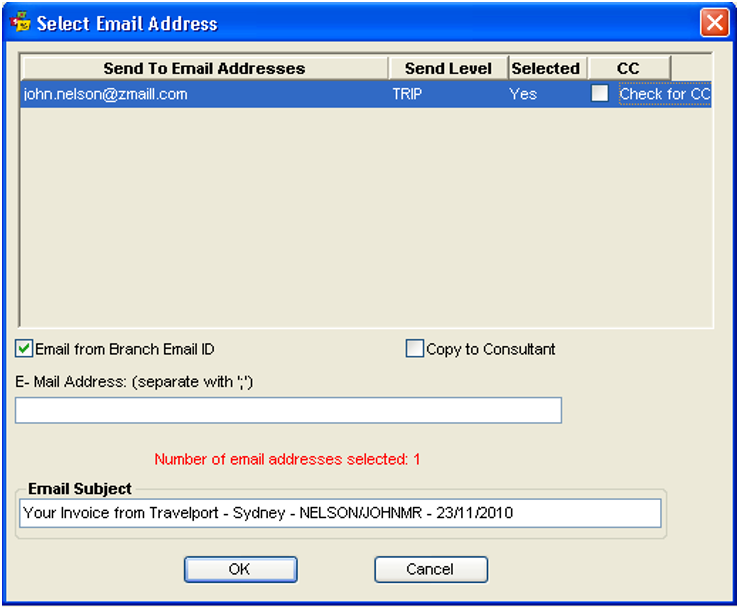
To send the email, click OK.
After clicking on the OK button, it will send the e-mail to the selected e-mail id/s. If the document is related to the Trip then it will be available in the Docs Tab of the Trip File under Email with the email address to which this email has been sent.
CCTE it will show the result of email as Success or Failed as it’s shown in the below screen shot. But only those documents will be available which are associated with the Trip.

Note: When there are no files open, the Documents menu will only show Fax and Visa Letter.