
This is part 1 of 6 in our series on managing groups in Trams Back Office.
Group accounting is one of the more complex subjects in Trams Back Office accounting. It’s complex because of the many facets that comprise proper Group accounting. A true team effort is needed from sales to data entry, to reporting and follow-up.
There is more than one way to handle Groups. The method you choose depends on your accounting and reporting needs. Unfortunately, there are also plenty of wrong ways to go about Group accounting. Group accounting becomes nothing short of chaotic when not executed with a solid plan, and a basic understanding of Group accounting.
In this article we learn how to set up Trams for a Group to reduce chances of data entry mistakes. The most common mistake in Group accounting is made when agencies do not use a Group field to link all relevant invoices, payments, or voucher to the Group. This is usually caused by a lack of preparation. Agents start receiving payments from clients and issuing MCO’s, etc. before the back office is prepared to receive the items and account for them properly.
Before any data for the Group is entered into Trams, follow these steps in Trams to reduce the chance of data entry errors:
Step 1) Link all Group items (invoices, payments, and vouchers) with a common Group name. Be consistent with use of this Group name to get accurate reports. Go to Utilities|Setup|Groups, and setup a Group Type of Invoice/Payment.
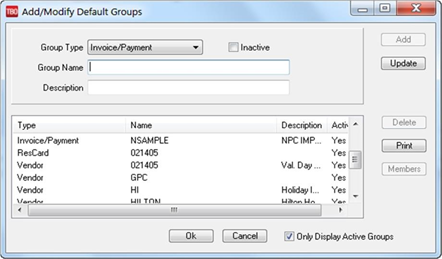
Step 2) In the Default Group field, enter the Group code. Click Add, and OK to save.
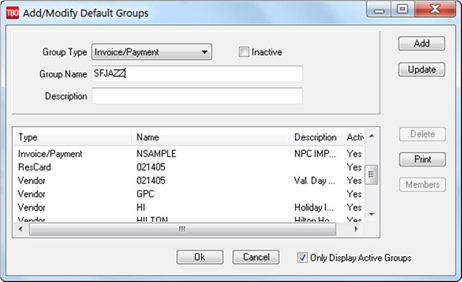
Keep the Group code short. Remember, agents have to enter this information manually, and the shorter the Group code, the less likely the chances of typo’s throwing off the results of Group reports. This Group code is used to link all Group items (invoices, payments and vouchers). The full Group name appears in the header of any reports you run.
Special Note to ClientBase Users: ClientBase users need to also set up a Res Card Group as well if they are creating invoices from ClientBase. Use the same Group name.
Step 3) Set up 2 profiles (one Vendor and one Corporate) for the Group. Go to Profile|Vendor and enter the full Group name. In the Interface ID field, use the Group code. Click OK to save. Next go to Profile|Client|Corporate and enter full Group name. In the Interface ID field, use the Group code.
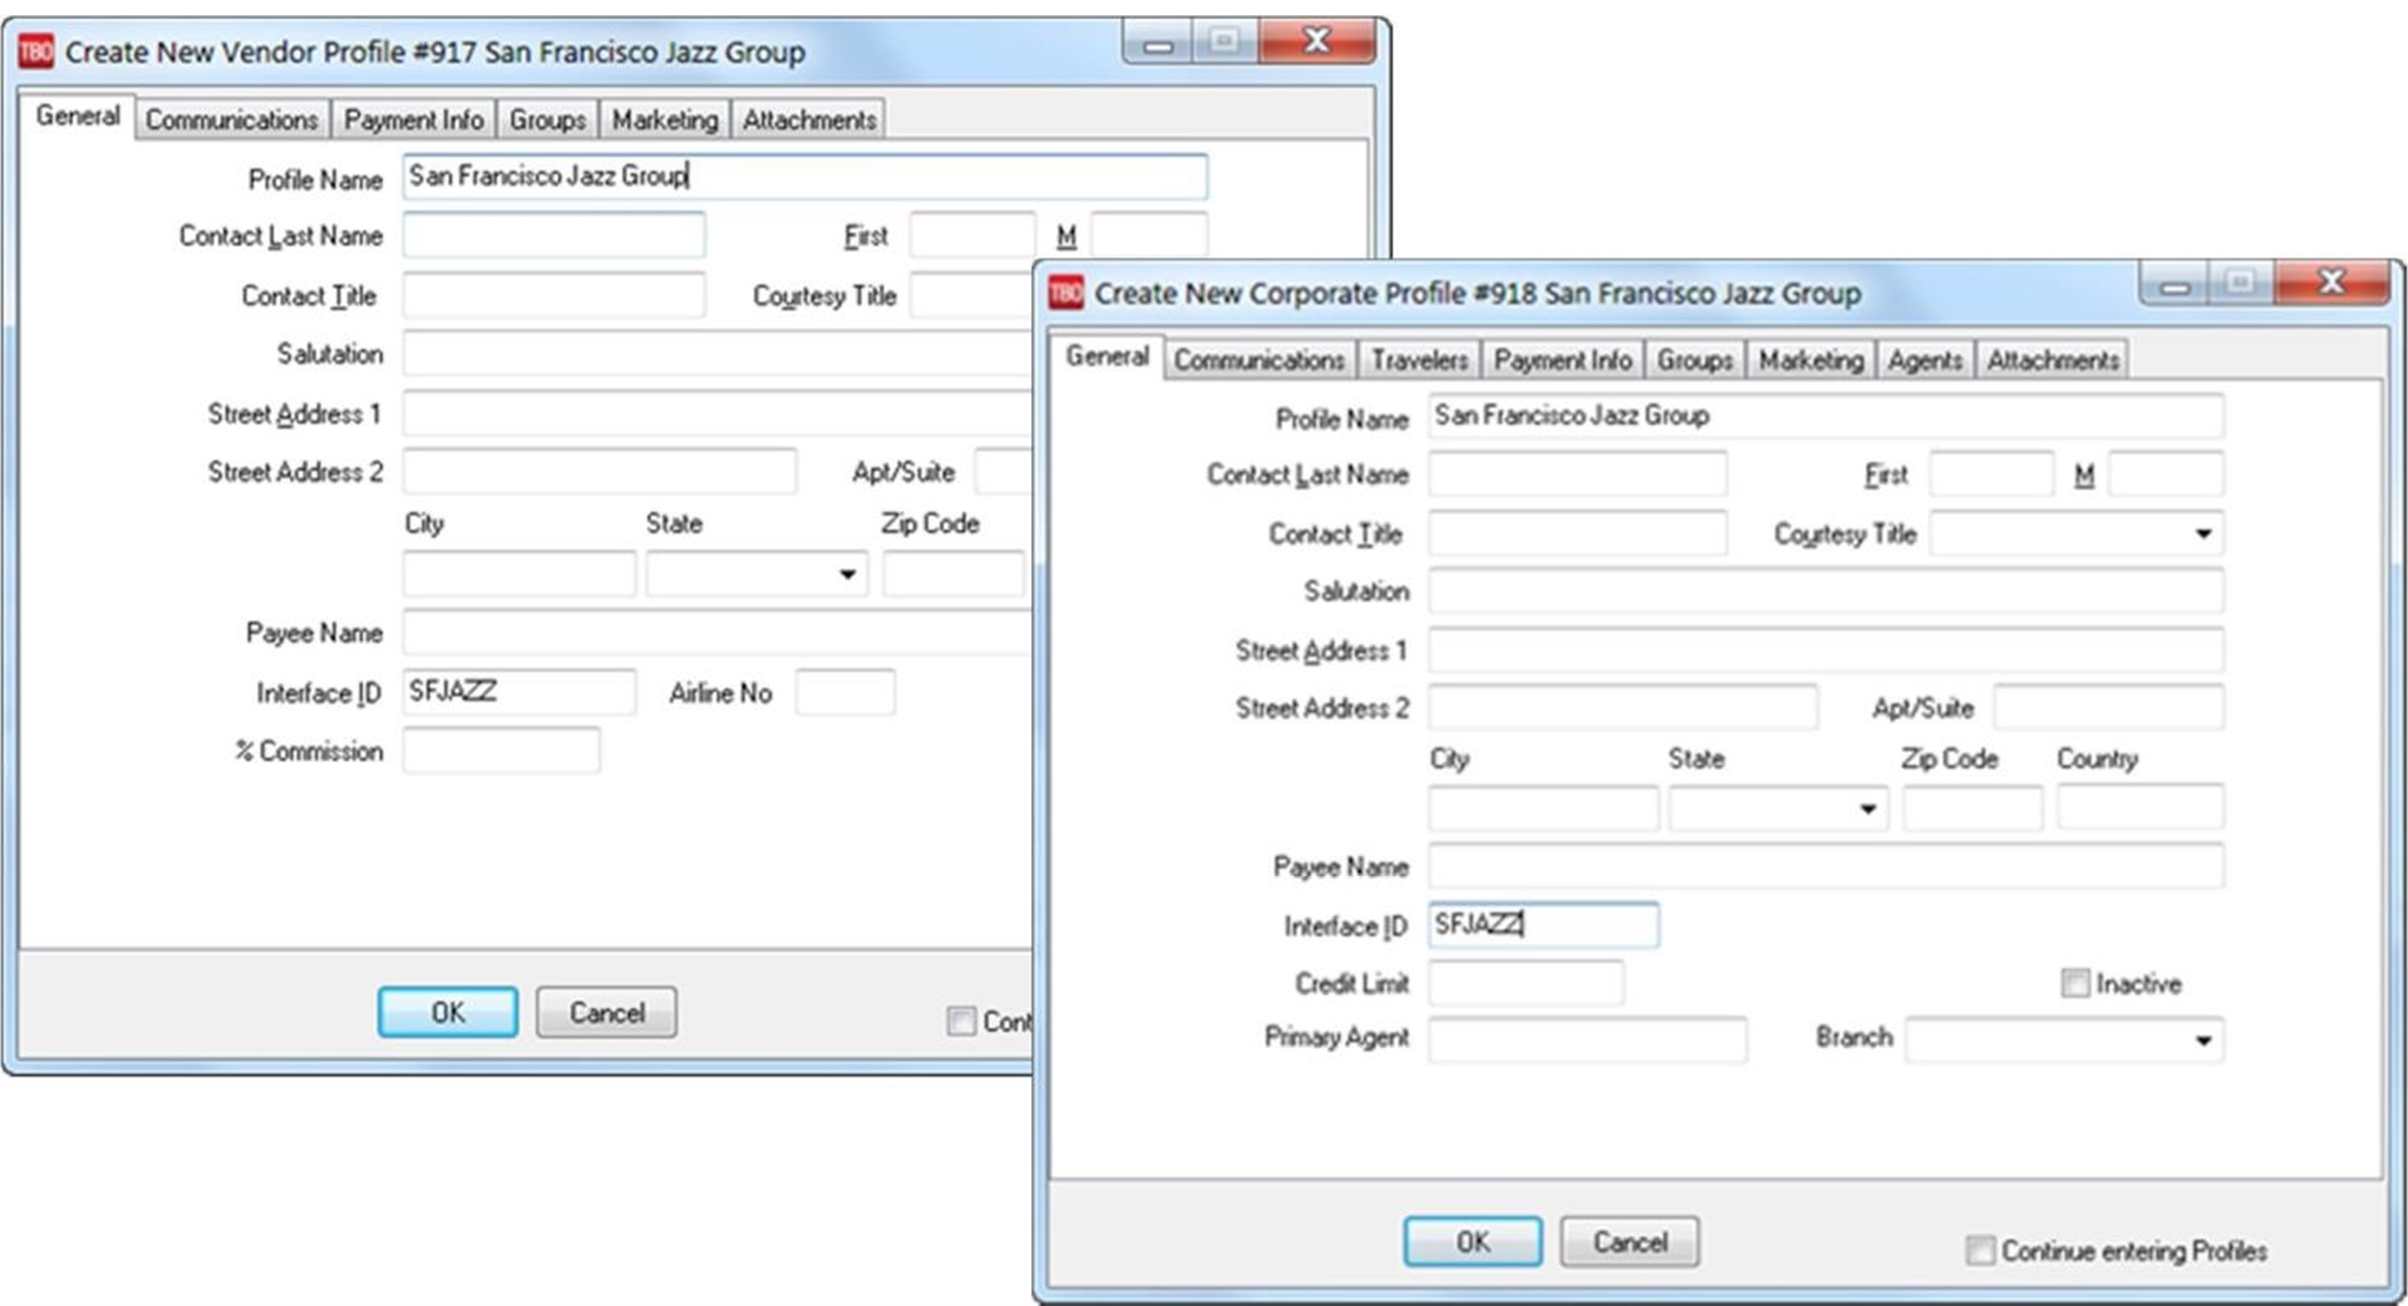
You’ll use these profiles if the agency has to issue items that may be returned and are not tied to a specific member of the Group, for example, an MCO to hold space for the Group or a deposit to a vendor that may be returned if the Group is cancelled.
Note: In both the vendor and the corporate profiles, we assigned the Interface ID of “SFJAZZ” (Trams reads the corporate and vendor interface ID’s from different fields, so we can use the same ID for different types of profiles.) This makes things easier on our agents. By using a common code, only one Group name/code needs to be remembered. This reduces the chance of data entry errors!
Let’s Review
- Set up your Groups prior to entering any payments, invoices, or vouchers.
- Assign a Group code in Utilities to reduce the chance of data entry errors.
- Create one vendor and one corporate profile for the Group. Both profiles have the name of the Group as the name, and the same Group code as the Interface ID.
Related Articles:
Groups in Trams Back Office: Part 2 – Handling Profiles for Groups
Groups in Trams Back Office: Part 3 - Group Invoices and Payments
Groups in Trams Back Office: Part 4 - Closing a Group