Export information from ClientBase Windows to Excel using 'Merge To' from the menu items.
Use the results of a Query to Merge to File. This enables you to create an ASCII delimited or text (.txt) file or a Comma Separated Values (.csv) file which can saved to a computer. This is particularly useful for agencies who use mailing houses for bulk mail or need to send their computer lists to consortia for special mailings.
Using the Merge to File Feature
1) The first step in using the Merge to File feature is to search in the Profile, Activity, or Res Card Manager to find the list of records to be included in the export.
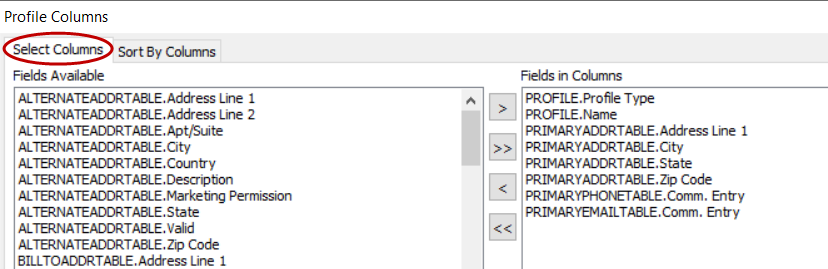
2) Designate the fields to include within the file for each record in your results. The fields to include are based upon the current columns displayed within your Query results. To change the fields to include, use Select Columns to add or remove the fields within columns as desired.

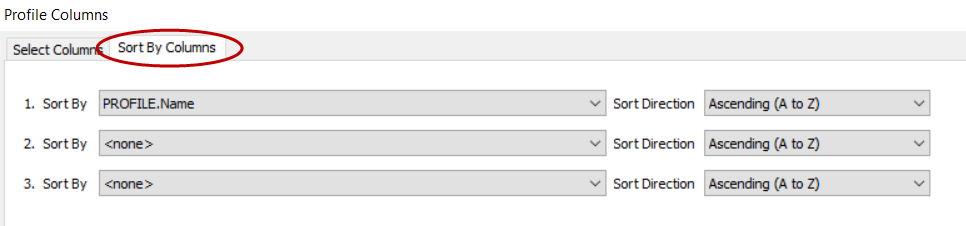
3) Designate the sort order to include within the file for each record. This sorting within the export is determined by the current sorting of the current Query results. To change the sorting, use Sort by Columns to setup to three levels of sorting criteria.
4) Click Merge To > File on the file menu items.

- A dialog box appears prompting you for the following information.
- File Name: Click the three dots next to the File Name field and select to which folder you want the file exported, and give it a file name. The default file extension is .txt. Change the file extension to .csv.
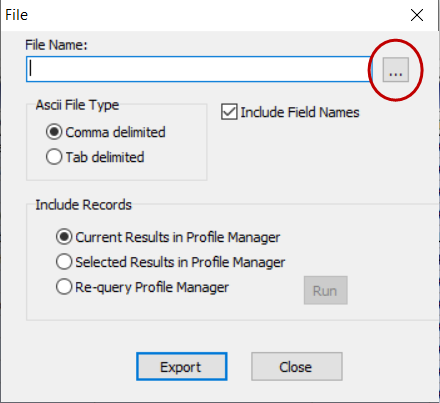

- Select Save.
- You do not need to edit the other defaulted options unless you selected specific items to export.
- For example, you ran a query and out of the 50 display items, you chose 25. If that is the case, you would want to choose "Selected Results in Profile Manager".

- Select Export.
- An information box will be displayed letting you know how many items were exported and the path to where they were saved. Select OK.

- Go to where you saved the file and open it. Even though the file was saved as .csv, it will automatically open in Excel.
- Go to File > Save As to save the file as .xsls.