
Skip To:
Travefy for ClientBase Windows
Although Travefy is not a typical Live Connect Provider, you may use the Live Connect connection process to send Res Card Reservation details to their site to create enhanced itinerary documents.
If you are not currently a Travefy Pro user, go to https://travefy.com/pro to learn more and register.
Set Up Travefy (Windows)
Upon receiving login information for each agent in your office, take the following steps to setup ClientBase for Live Connect.
Step 1) Create a Live Connect Provider for Travefy if none exists by going to Utilities|Live Connect Providers, and clicking Add.
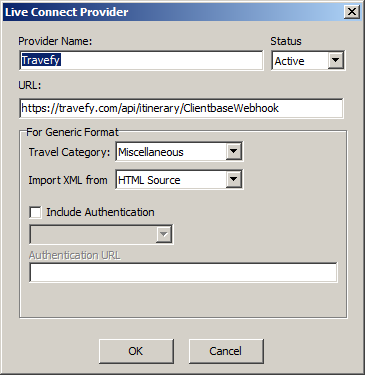
- Provider Name: Enter Travefy.
- URL: Enter https://travefy.com/api/itinerary/ClientbaseWebhook
- Travel Category: Enter Miscellaneous from the drop-down menu.
- Import XML from: Enter HTML Source.
Step 2) Set up for Live Connect agent logins can be done individually or globally for the agency. Users can set up their own logins by going to Utilities|My Login|Live Connect and clicking Add. To set up globally, go to Global Defaults|Res Card Defaults|Live Connect to enter the User Name, and Password that everyone in agency will use. When Live Connect is launched, the system first looks to see if there is login information at the User Login level, and if not, then looks at the global login.
- Live Connect Provider: Select Travefy from the drop-down list.
- User Name/Password: Enter the necessary fields based upon the login information provided to you when you registered with Travefy. User name is e-mail address and your selected password.
- Account Number: Not needed.
- Agency Code: Not needed.
Transferring Reservation details to Travefy (Windows
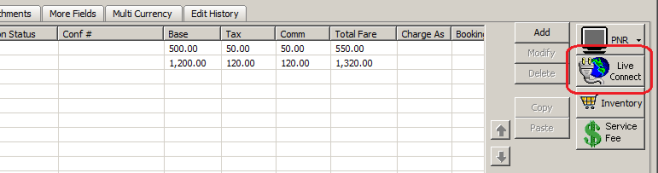
Step 1) Open an existing Res Card in ClientBase. Choose Live Connect in the lower right:
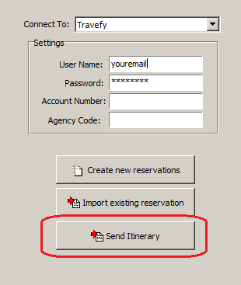
Step 2) Select Travefy from the “Connect To:” drop-down menu, and then click Send Itinerary. If you do not see this button, make sure to review the Setup steps above. The Travel Category for this provider must be set to Miscellaneous.
- If your login credentials and reservation number are not present in ClientBase before connecting, the import will not work.
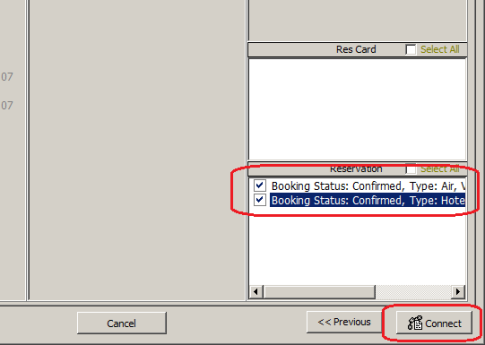
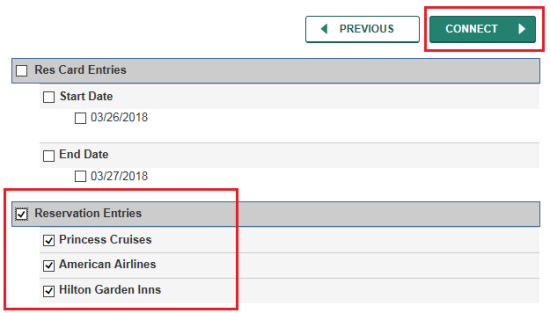
Step 3) Select the Reservations in the lower right area that you wish to send to Travefy, then click Connect. No other details will be available to select.
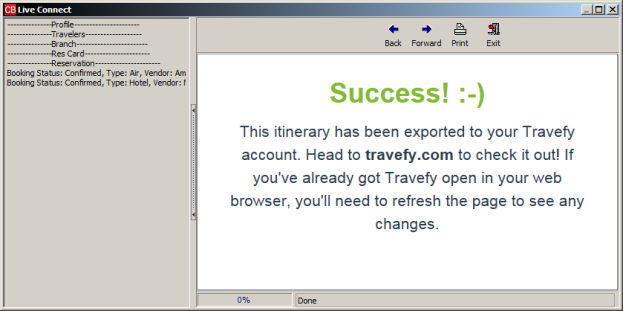
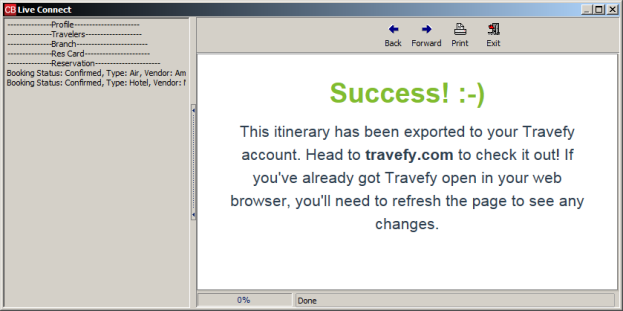
Step 4) Travefy will then display the following page to indicate that they have received the reservation details successfully. You can then click Exit to close this window and view the Itinerary at travefy.com.
Travefy for ClientBase Online
Although Travefy is not a typical Live Connect Provider, you may use the Live Connect connection process to send Res Card Reservation details to their site to create enhanced itinerary documents.
If you are not currently a Travefy Pro user, go to https://travefy.com/pro to learn more and register.
Set Up Travefy (Online)
Upon receiving login information for each agent in your office, take the following steps to setup ClientBase Online for Live Connect.
Step 1) Create a Live Connect Provider for Travefy if none exists by going to Tools|Settings|Live Connect Providers, and clicking Add.
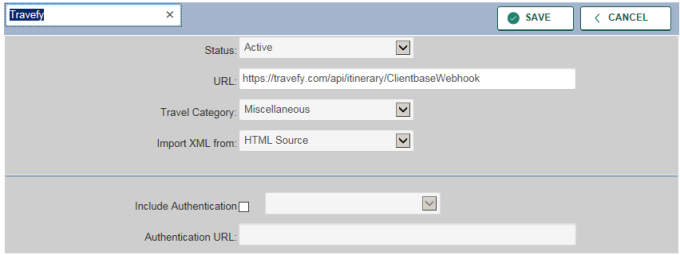
- Provider Name: Enter Travefy.
- URL: Enter https://travefy.com/api/itinerary/ClientbaseWebhook
- Travel Category: Enter Miscellaneous from the drop-down menu.
- Import XML from: Enter HTML Source.
Step 2) Setup for Live Connect agent logins can be done individually. When Live Connect is launched, the system first looks to see if there is login information at the User Login level, and if not, then asks the user to login at the provider website. Users can set up their own logins by going to Utilities|My Login|Live Connect and clicking Add.
- Live Connect Provider: Select Trafefy from the drop-down list.
- User Name/Password: Enter the necessary fields based upon the login information provided to you when you registered with Travefy. User name is e-mail address and your selected password.
- Account Number: Not needed.
- Agency Code: Not needed.
Transferring Reservation details to Travefy (Online)
Step 1) Open an existing Res Card in ClientBase. Choose Live Connect in the lower right:
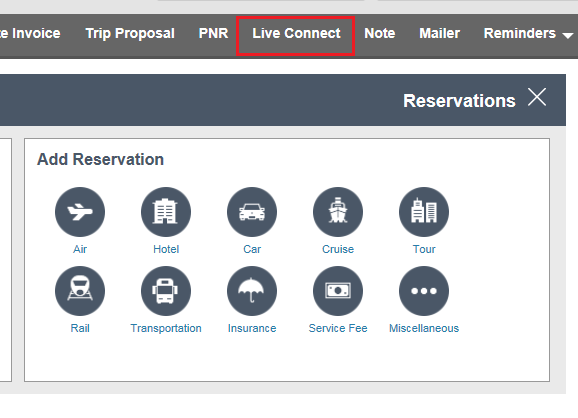
Step 2) Select Travefy from the “Connect To:” drop-down menu, and then click Send Itinerary. If you do not see this button, make sure to review the Setup steps above. The Travel Category for this provider must be set to Miscellaneous.
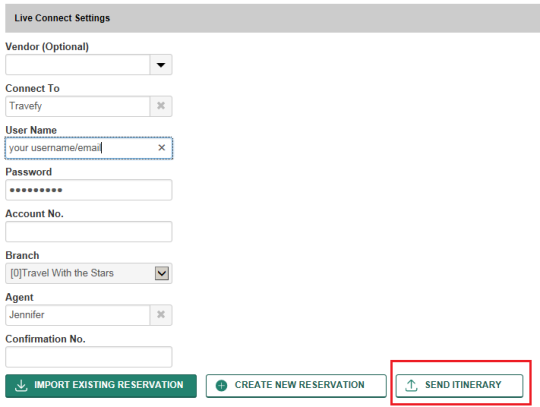
- If your login credentials and reservation number are not present in ClientBase before connecting, the import will not work.
Step 3) Select the Reservations in the lower right area that you wish to send to Travefy, then click Connect. No other details will be available to select.
Step 4) Travefy will then display the following page to indicate that they have received the reservation details successfully. You can then click Exit to close this window and view the Itinerary at travefy.com.
Travefy for ClientBase Windows Recording