The Branch and Setup screens allow the System Administrator to carry out system maintenance functions, e.g. recording new branches, adding or modifying the agency name and address details, creating users and passwords, setting up security levels and customising documentation.
- The Set-up Only section contains settings for the entire database or network, for all branches.
- The Branch section contains information relating to each individual branch or agency.
In order to add, modify, or delete Branch and Setup data, the System Administration must log in to CrossCheck Travel Enterprise using the Supervisor User Id and Password. (The password is available to managers only from the Help Desk).
Structure
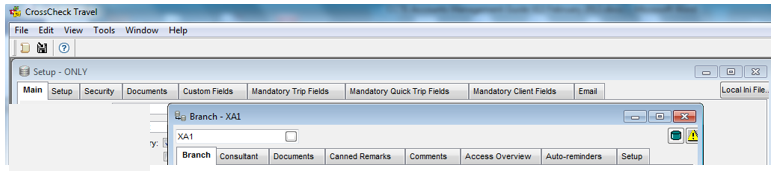
CCTE will open with one section overlapping the other. The Branch section will open on top and the Set-up–Only section is visible in the background.
Move from one section to the other by clicking on the visible screen in the background. The user can also move from the Branch screen to the Setup screen by clicking on the Database Setup button in the top right hand corner of the Branch screen.
The toolbar remains the same regardless of which tab is open but the Menu bar items alter accordingly. This reference tools will demonstrate how to make changes under each tab where required and advise against alterations when relevant.
Branch Tab
This screen is used to record your agency details and is initially completed by your Travelport representative upon installation of CrossCheck Travel Enterprise.
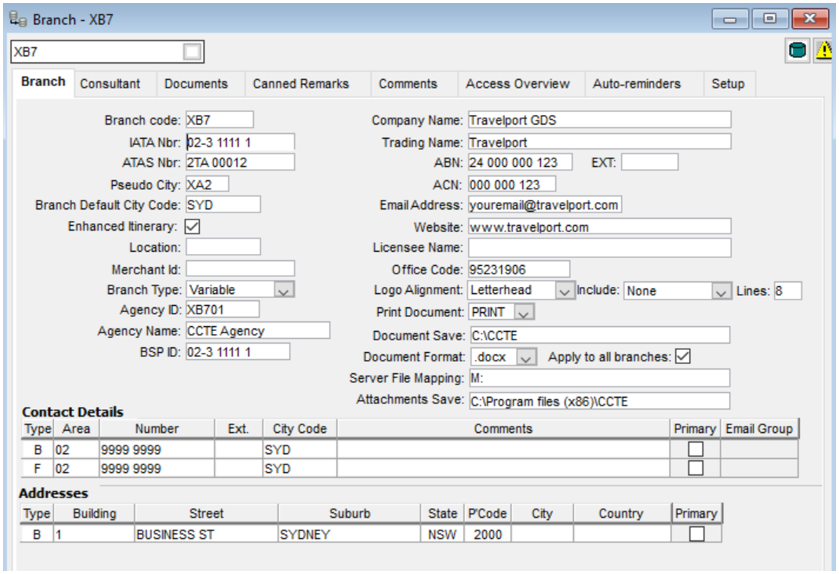
The Branch tab screen has the following fields:
* Indicates that the data in these fields is used in document headers, (e.g. in itineraries and invoices).
|
Field |
Description |
|
Branch Code |
Unique code for your Branch. Recommend that your Travelport+ Pseudo City Code be used. |
|
IATA Number* |
Where applicable, complete with IATA or DAPA number. |
|
ATAS Number* |
Where applicable, complete with Travel Agency ATAS number. |
|
Pseudo City |
Travelport+ Pseudo City Code, used when moving the MAR during upload. |
|
Branch Default City Code |
IATA city code |
|
Enhanced Itinerary |
Leave with the default tick to enable Canned Remarks to be uploaded from the Travelport host system. |
|
Location |
|
|
Merchant Id |
Merchant Id for Credit Card Transactions. |
|
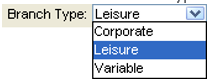
Branch Type |
Workflow Type that is applicable for the Agency. This manual is based on Leisure Workflow. See Debtor Hierarchy Guide for Corporate and/or Variable Workflows in My Travelport. There are 3 Workflow types:
|
|
Agency ID |
|
|
Agency Name |
|
|
BSP Id |
Agency BSP Id number – used in BSP Reconciliation. Enter the IATA BSP number. This number can be changed. This field must be completed if the agency uses the Creditor BSP Report. |
|
CalypsoNet Password |
The supervisor module will hold the CalypsoNet password for the Agency. This will be held at the Branch level, with the option to apply the credentials to some or all branches within the database. The password must be masked for security purposes. Selecting the “Apply to all branches” checkbox will enable CalypsoNet import for all branches in the database. By default, the “Apply to all branches” option should be unchecked. |
|
Company Name* |
Full Agency Company Name, including any Pty. or Ltd. (maximum 50 characters). |
|
Trading Name* |
Name under which your Agency trades. |
|
ABN (GST)* |
Where applicable, Australia agencies should complete with their Australia Business Number. New Zealand Agencies should complete with their GST number. |
|
EXT* |
Where applicable, enter ABN extension number. |
|
ACN |
Where applicable, Australia agencies should complete with their CAN. |
|
Email Address |
Enter Agency Email Address. |
|
Web Site |
Where applicable, enter the Agency Website. |
|
Licensee Name |
Enter Licensee name. This prints in header on documents. |
|
Office Code |
Not used at this time. |
|
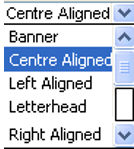
Logo Alignment |
Logo can be set to Banner, Left Aligned, Letterhead, Right Aligned or Centre Aligned.
|
|
|
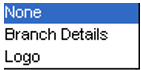
If Letterhead is selected, two new fields will become visible - Include” and “Lines” fields based on this selection – see Settings for Printing Documents on Letterheads below.
For the Branch set to ‘Letterhead’ logo alignment, CCTE will always add the: a) Logo from the Branch profile in the top-left corner. b) Branch details in centre after the logo. Document details after leaving 2 lines spacing from the Branch Details. |
|
Print Document |
Set at Branch level to Print or PDF. |
|
Document Save |
The document saving location for each Branch or individual user. |
|
Document Format |
CCTE Word Documents can be saved in different Word format (.rtf, .doc, .docx). |
|
Server File Mapping |
Default mapping drive Y: set in the Server File Mapping field. If the mapping has not been updated as detailed below, then documents will be saved to the location mapped with Y drive. |
|
Attachments Save |
The pathing allows gives the ability to link an external document (e.g. a pdf, a .doc file, a scanned image etc.) to a client file or a trip file. Uploaded documents can be viewed through the hyperlink. |
Phones
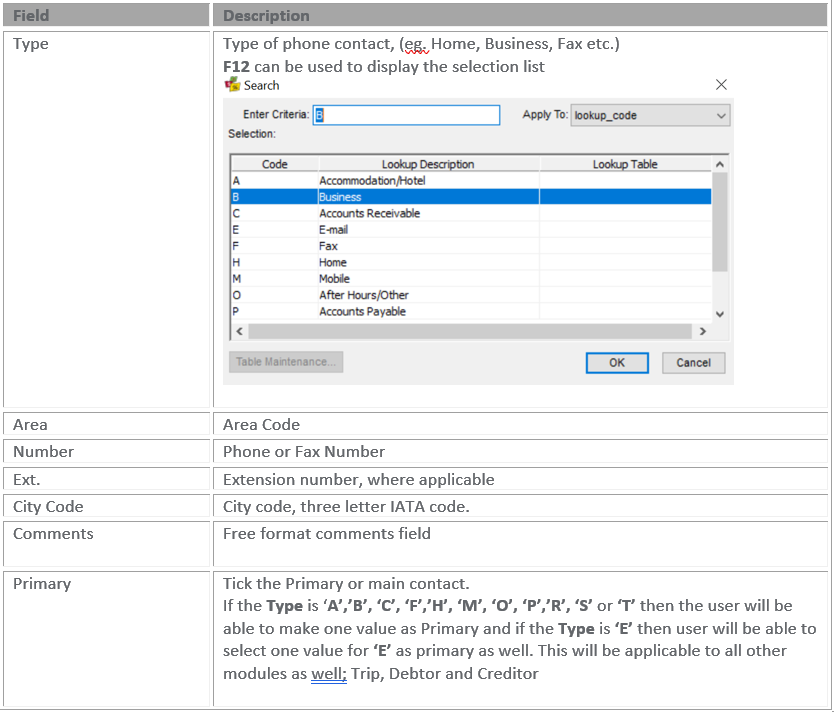
If the user has included a number of phone fields, a scroll indicator becomes available.
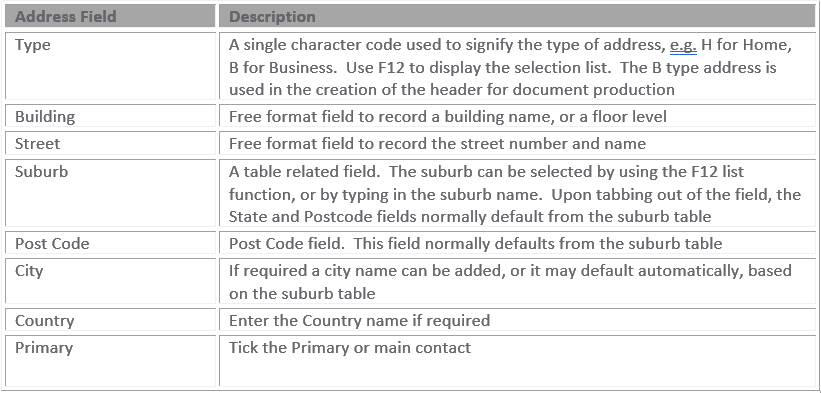
Address