Quick Trip
The Quick Trip functionality can be used to provide clients with a detailed quote and to create a Trip file with segments and quotes, from one input screen.
To create a new Quick Trip, click on the Quick Trip icon on the MyCCT toolbar or select Quick Trip Wizard from the File menu.

The Quick Trip - Create New Trip and Quote screen will be opened.
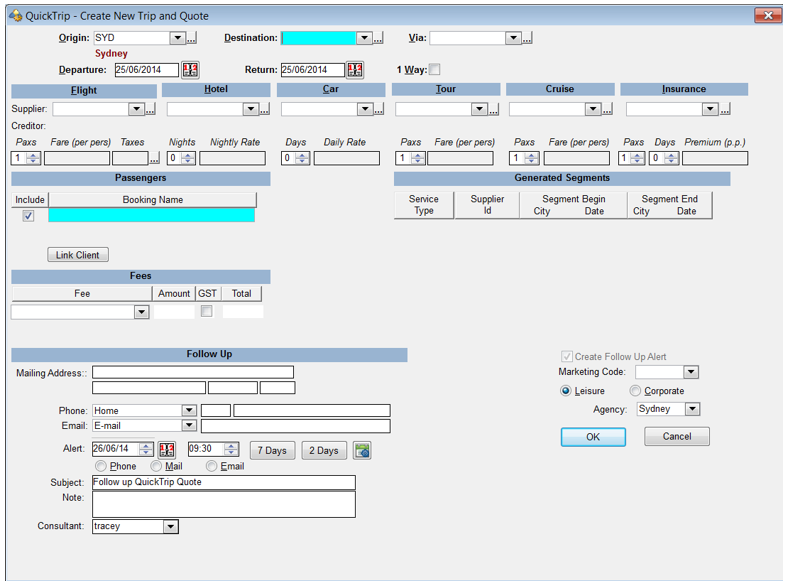
Complete the screen with segment data as required, and as each sector is built into the Quick Trip Quote the segments will appear under Generated Segments.
Itinerary Dates and Destinations

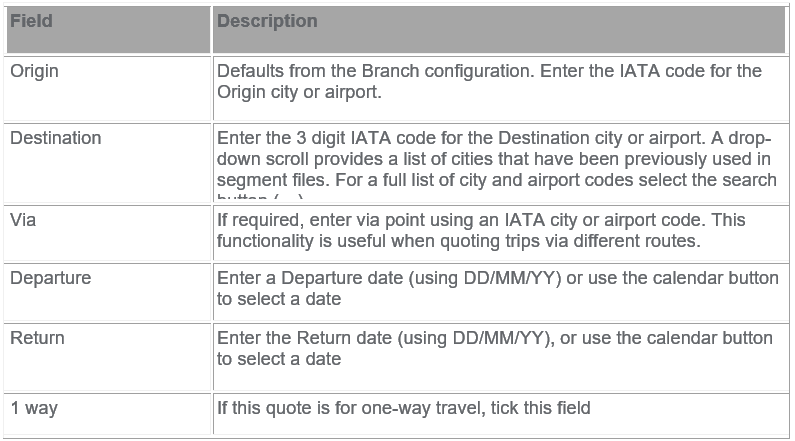
Suppliers / Segments
Drop-down lists are available to access the most commonly used Suppliers from previously booked segments. A full list is available from the search (...) button. If Supplier is linked to a Creditor the Creditor will automatically be input.

Complete all Fare details per Service type

The Generated Segments section of the Quick Trip screen is populated as each service type is completed, and is a summary of the quote.
Passengers
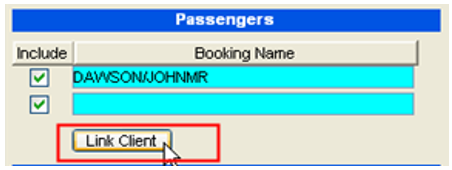
The number of lines available is governed by the number of passengers indicated in the Pax field. Enter the name in airline format (i.e. Surname/ Given Name Title). If the name is not entered in this format the Trip and Client file codes will not be created to correctly identify this file.
When entering passenger names, it is possible to link the primary passenger (the one named in the first name field) to a Client File. To do this, click the Link Client button after entering the passenger’s name.
A Client File look up screen will display. Select the correct Client profile and click OK.
The primary passenger in the Quick Trip will now be linked to the Client Profile.
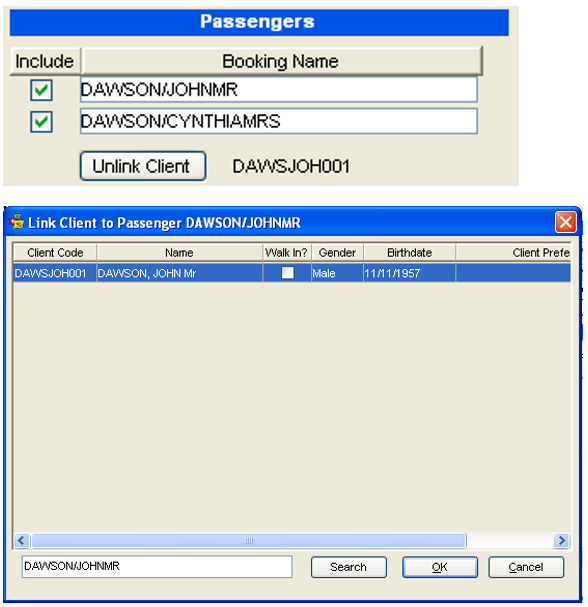
To unlink a passenger in a Quick Trip from a Client profile, click on the Unlink Client button.

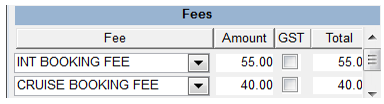
If Fees are loaded in the database these may be added at this time
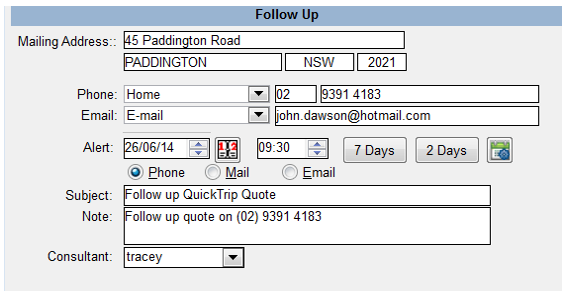
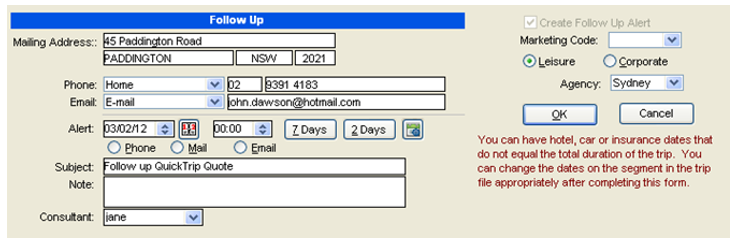
Follow Up and Passenger Details
Tick the Create Follow Up Alert box if a reminder to follow up on the quote is required. Complete the passenger contact detail fields and set the Alert date and time.
Tick the radio button to specify the means of contact (i.e. Phone, Mail or Email).
Enter the Marketing Code by selecting by selecting from the drop-down list. Select the appropriate trip type, Business or Leisure.
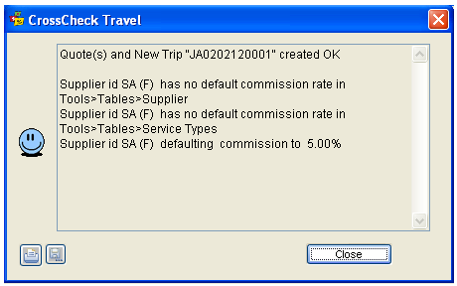
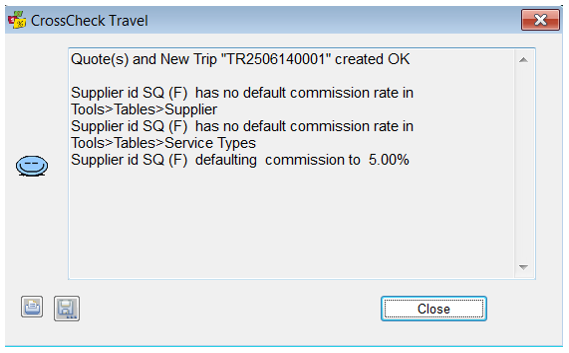
Click on OK to save the trip details.
When OK on this screen if Creditor is incomplete and as a reminder to go to your Quotes and input commission values, a screen similar to the below will appear.
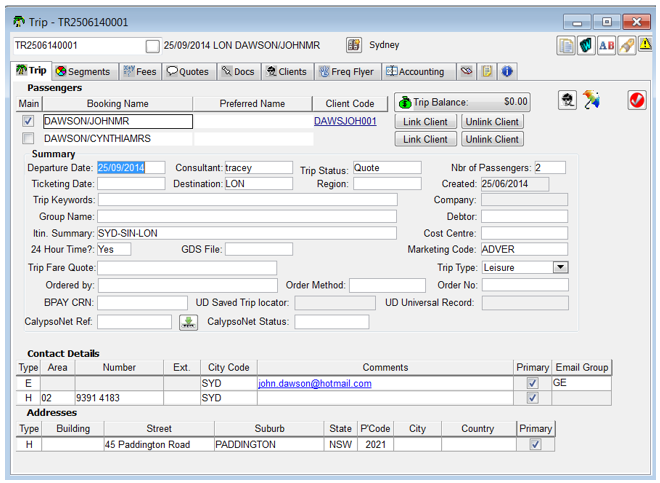
Creating a Booking from a Quick Trip
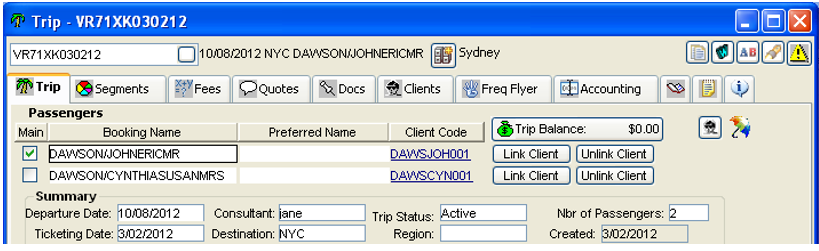
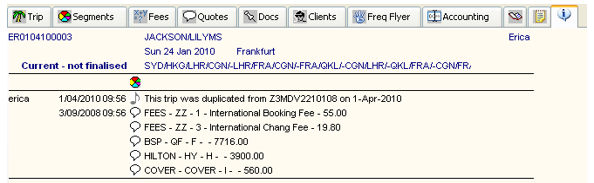
The Quick Trip information is transposed into a new Trip file, and a User Comment is automatically created, advising that this Trip was created from a Quick Trip.
The Trip Status field is automatically completed as Quote. If the primary passenger was linked to a Client file, the Client file link will be present in the new Trip file.
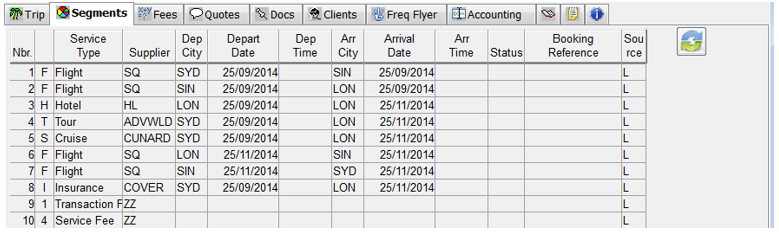
Segments Generated from the Quick Trip Window
The segments have already been completed. Further details can be added in each segment as necessary. Car and hotel segments will pick up the default currency code.
Fees Generated from the Quick Trip Window
Fees are added to both the Fees tab and the Quote tab
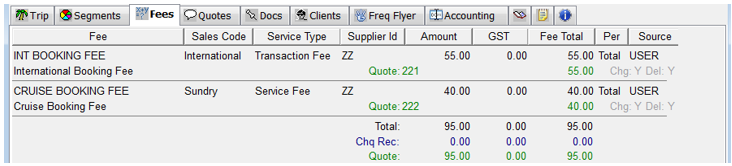
Quotes Generated from the Quick Trip Window
Fees entered in the Quick Trip window will now always appear in the Quotes grid below all other types of Quotes.
Re-open the Quick Trip input screen from the Quotes area by clicking on the icon. This will re-display the Quick Trip screen with the Follow -up details and Origin, Destination and dates transposed from the existing quote.

If the quote has been accepted, update the status of the Trip file to Active (from Quote). The same Trip file can be used to store the Travelport+ booking once it has been created.
See "Manually Creating Trip Files" in Module 5: Trip File.
Tracking Quote to Booking
Quote to booking process, enables agents to track the lifecycle of a booking from beginning to end. This will be achieved by providing configurations in CCTE to mandate and prompt users for Trip Status updates and Follow Up Workflow Action items.
The agency supervisor can set Quick Trip fields as mandatory in the Setup Only screen - Mandatory Quick Trip Fields Tab, see CCTE Finance Guide. The “Follow Up Mandatory for Quick Trip used to create Trip Files” checkbox should be checked to make the Follow up reminder mandatory for Quick Trip creation.
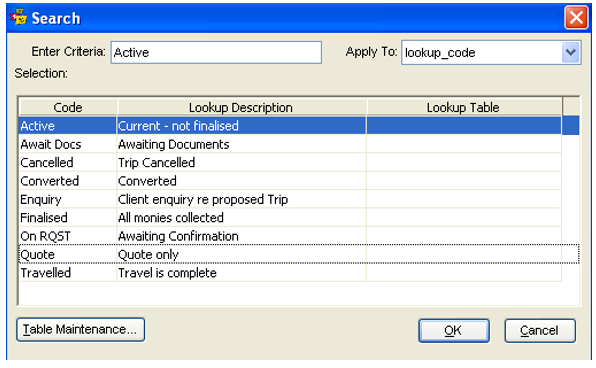
The Supervisor will also be required to set up new Trip Status type in Tables.
Some agencies wish to track the process and time line of a quote to booking, a Manager is now able to retrieve a Report to track this process.
Only “Trip Status” with the value ‘Follow Up’ in the Table Code Maintenance will initiate the Follow Up Workflow Action item process.
- The Follow Up prompts will only appear for new Trip Files/Quick Trip
- Follow Up prompts will not be applicable to the Trip Files created prior to this enhancement
- Trip Status prompts will be applicable to any trip file that is updated
Once this has been checked the user must fill in the mandatory fields when a trip file is created via Quick Trip.
Trip Status will remain as a manual update, except:
- When a trip file is created from Quick Trip where a Trip File is created– it defaults to “Quote”
- When the Trip File is downloaded from the GDS – it defaults to “Active”
Create NEW trip with status of Enquiry, workflow action item is created if this is set to Follow Up PROMPT.
Trip Status can be changed to Enquiry and Saved, then when Converted changed to Active, or Converted as required by the Manager, and as per Table setup.
When a Trip Status needs to be updated, this does not happen automatically, and the onus is on the Consultant to update, a message will appear to encourage the Consultant to update.
The Follow Up Workflow Action Item will pop up when a Trip File is created.
Note: Workflow Action Items are labelled as either an ‘Action’ or a ‘Follow Up’.
Consultants can view the “Type” column under Action Items in following areas in MyCCT:
- My Open Items
- Everyone Overdue
- Everyone Today
- My Completed Items
- Created by me – 90 days
- Per Branch
- Per Consultant
The following message is received once a Workflow Action Item that was created as a Follow upPROMPT has the status changed to Completed and the Resolution has not been completed, when attempt to close Trip file.
Complete the Resolution
When a Follow Up Action Item Status is changed to Completed, an additional field will appear for the Resolution to be completed.
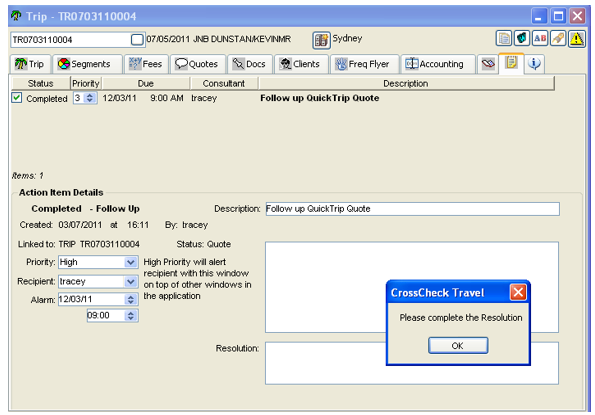
OK on the screen, and complete the Resolution.

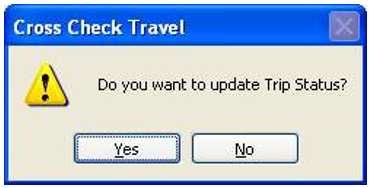
Then Click Yes to Save the changes.
The Trip will then Close and it is up to the Consultant to change the status of the Trip file as required by reopening the Trip file and double clicking in Trip Status.
Click OK once, select Trip status to update, then save Trip again.
Note: The Resolution message will only appear when Workflow Action item status is Completed and the Follow Up PROMPT has been set up in Trip Status Code Tables and mandatory Branch settings have been setup by Supervisor.
This only applies to Trips where Trip status was originally created with Trip status of Enquiry, or Trip was created from Quick Trip Quote.
Creating a Trip File from a Client File
A Trip file can be created from the stored details in the Client file, without uploading and downloading through Smartpoint. This is useful when a regular client books a land only itinerary.
Open the Client file and click on the Create Trip icon located on the Client tab.
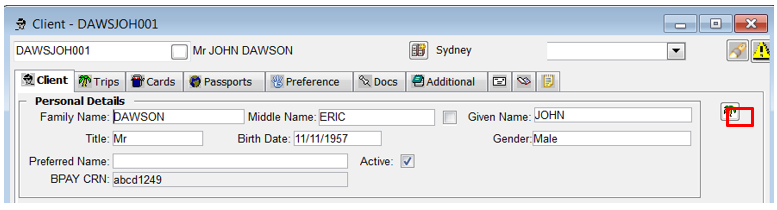
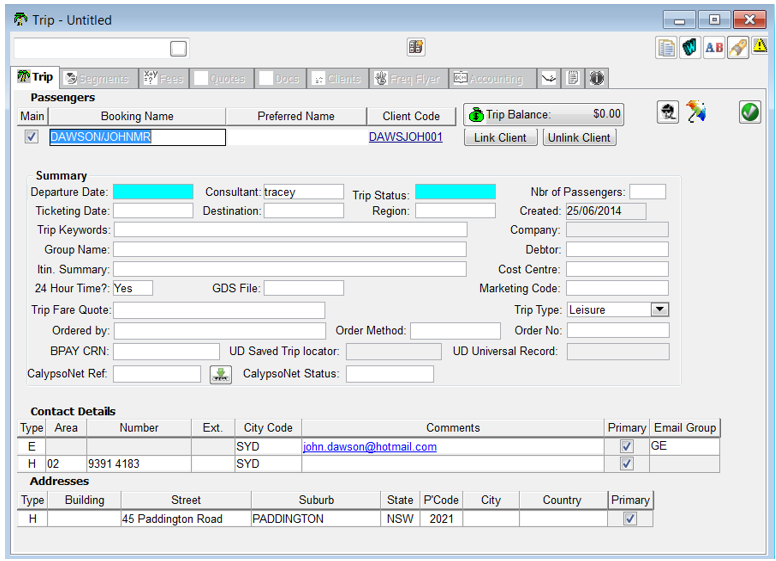
A Trip file has been created, with the contact details transferred from the Client file. Complete the mandatory fields and Save the file.
CCTE also automatically creates a link between the Trip file and Client file, indicated by the hyperlink on the Trip tab. Mandatory fields must be completed and Trip saved to complete.
Creating a Trip File using Duplicate Trip
Duplicate Trip allows users to copy Trip file details into a new file. Items copied are Segments, Quotes, User Comments and the following items from the Summary section of the Trip tab: Destination, Departure Date, Region, Trip status, Order Number, Marketing Code, Number of Passengers and Cost Centre.
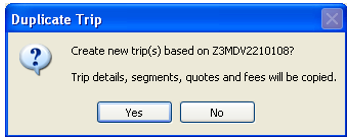
Open the Trip you wish to copy and select the Duplicate icon.

Select Yes on the following prompt to proceed.
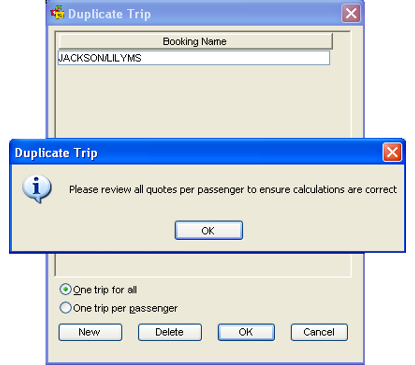
Add the passenger Names on the Duplicate Trip screen.
To create addition lines select the ‘New’ button or Ctrl + N. There are two options available for multiple passengers:
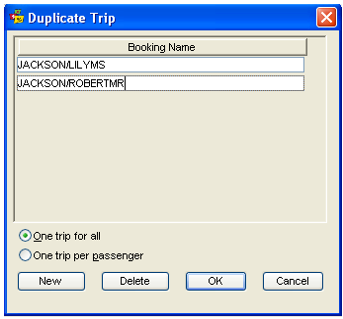
Select One trip for all OR One trip per passenger.
Select OK to finish the process.
Different number of Passengers
If the number of passengers in the new Trip differs to that of the original a reminder prompt will be displayed to review the Quotes to ensure the cost details are correct.
Rebooking
The Duplicate Trip process is an internal CrossCheck Travel Enterprise function. All services such Flights, Hotels, Cars and Tours must be booked by the agent with the applicable suppliers for the new Trip(s).
The Comments and Overview tabs record that the new file was created using the Duplication process.
Note: A copied file can be recopied to create another file. The Comments field and Overview tab will store cross reference to both copied files.
- A Trip without segments and quotes can also be duplicated
- Two existing Trip files cannot be copied into one new Trip
Automatically Creating Trip Files
Downloading
A Trip file is automatically created when a booking file is downloaded from Smartpoint into CCTE.
Take the following steps to download the booking file:
Display the booking file in Smartpoint and click the Download icon on the Toolbar.

CCTE will confirm the completion of the download and provides options to return to Travelport+ or proceed to the Trip file.
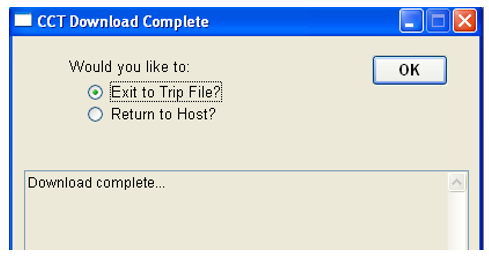
The recommended procedure is to select Exit to Trip File (default) and click OK. This will open the new Trip file, make any additions and Save the file.
Note: Phone numbers are only downloaded on the initial download. Both Waitlisted and Confirmed sectors for the same flight, in different classes, are downloaded. Text Segments (i.e. RD.T) do not download to CCTE.
Downloading a new PNR to an existing Trip
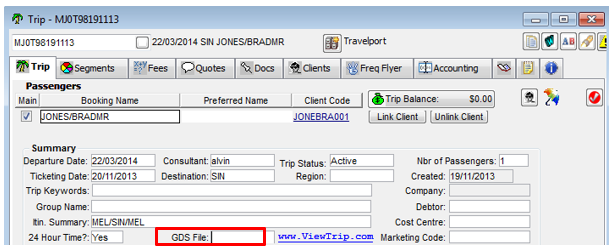
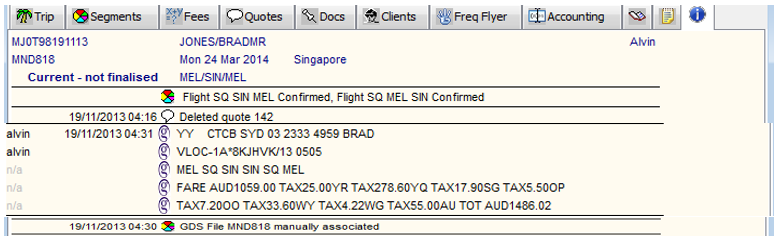
Where a ticketing deadline is missed the itinerary must be rebooked in a new PNR. Previously when the new PNR was downloaded to CCTE a new trip file was created and accounting may have been input into the originally downloaded trip file. It is now possible to download a new PNR into an existing trip file which may contain accounting – this saves a user having to create adjustments between trips and the segments and quotes can now be saved in this trip file with the new GSD File Field.
The user needs to delete the Travelport+ segments from the original trip, this will unlock the GDS File field so the new record locator from the rebooked flights can be saved linking the current PNR to the original trip file which contains the accounting data.
To enable the unlocking of the old booking file field on the front of the Trip:
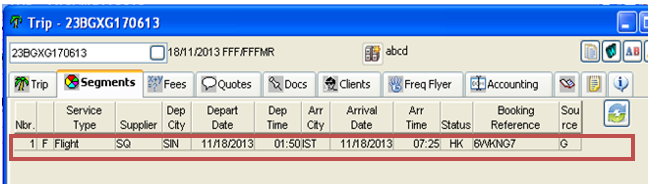
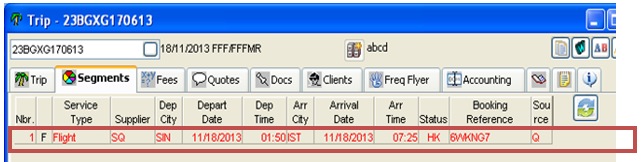
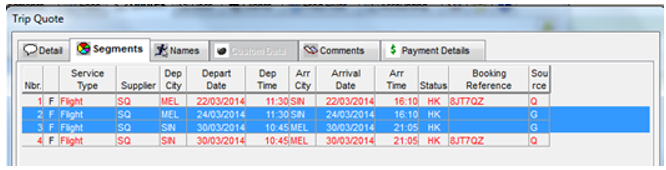
- All GDS segments must be deleted by the download of a cancelled PNR or deleted manually within the Trip to enable users to update the GDS File Field. The segments will change source to Q and show in red.

- The user must delete the segments associated in the quote by one of the below methods:
- Delete the quote and then create a new quote.
- Associate a quote to other non-GDS segments and then re-associate the quote with the new GDS segments.
In this way, the user does not lose the information in the quote.
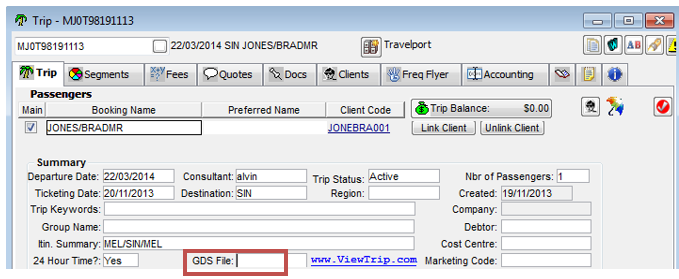
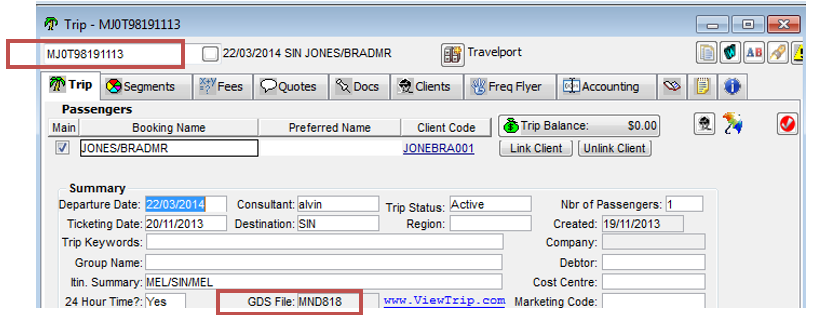
- Delete the GDS File field from the front of the trip file and copy the new record locator into this field
 , Save, Close trip and Re-download the PNR.
- When downloading if an existing trip with the same PNR number exists as that which is already in CCTE, and the name of the passengers in the PNR does not match with that in CCTE, a “Select a trip to re-download” dialog window will appear:
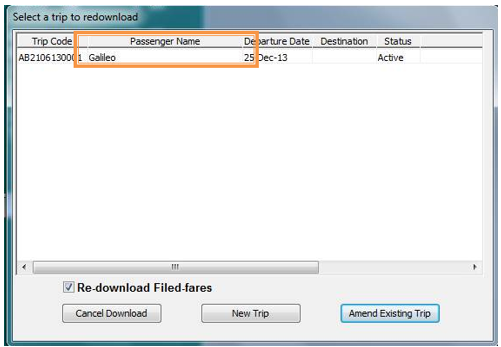
It should be noted that in these cases, if the user wishes to download the new booking file into the earlier trip file with the new PNR number, the user must select the “Amend Existing Trip” option.
The Trip file is re-downloaded without any GDS segments where the trip contains a Quote attached to the cancelled segments.
Where a quote is associated to the cancelled segments the user will receive the existing prompt for quote maintenance. The user shall delete the segments & quotes if they exist in CCTE.
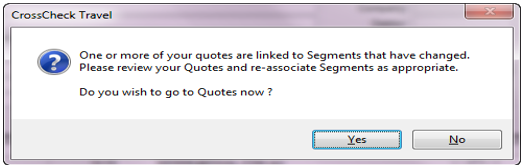
The user should click Yes and re-associate the new segments to the quote.
GDS file field becomes editable when all GDS segments (G) are deleted.
- The user manually deletes the segments associated with a downloaded PNR.
- The trip file contains a mix of manual (L) & GDS (G) segments. The user cancels & re-downloads the cancelled PNR which results in the GDS segments being deleted from the trip file.
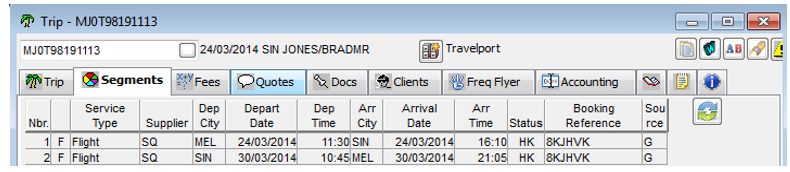
- The user enters the new GDS file locator in the existing trip file & downloads the new PNR into the existing trip file.
- Segments from the newly linked PNR should download to the CCE Trip file.
The user must be able to view the activity of the removal of a PNR & association of the new PNR in the Trip Overview tab.
Downloading with Duplicate Record Locators
Travelport+ Record Locators are recycled therefore the CCTE application could already hold a Trip file using the Record Locator currently being downloaded. In this case, the download process performs an analysis using the departure date and the Record Locator.
The system searches for departure dates matching, within 30 days, to the booking file being downloaded. If none are found, the download proceeds as normal. If booking files are found, a Select Trip to re-download screen will appear.
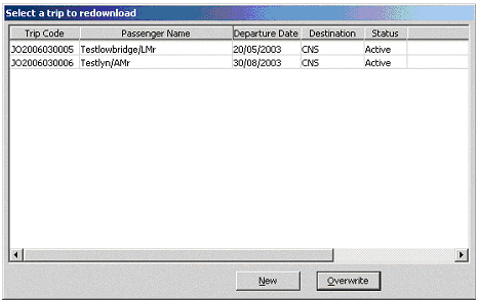
If the booking file being downloaded should replace an existing Trip file, highlight the file from the list and click Overwrite, otherwise click New to create a new Trip file.
Downloading Past Date Booking Files (PDQ)
If it is necessary to download a Travelport+ booking file with a past date, the download process looks for files in CCTE with the same name, record locator and creation date as the host file.
The system does not look at manually created trip files if the name, record locator and the creation date do not match the PDQ file.
If the booking file has been downloaded before, CCTE will display a list of matching trip files. Select the booking file from the list and click the Overwrite button. If no booking files are found, the list is empty and the option to create a New trip file is available.
Downloads with New Codes
If a Booking File is downloaded containing a supplier or city code not previously used in CCTE, the download will continue and CCTE will create a new Workflow Action Item. The Action Item ensures the new code is updated in the CCTE system tables. The Alert Item is given a Priority of Urgent and is assigned to the currently logged in user. If the current user doesn't have appropriate security settings to update the tables, the Alert Item can be forwarded to the Manager for action.
Updating Tables Following Download
To update CCTE with a new code, select Tables from the Tools menu. Select Supplier or City Code from the sub menu (depending on requirements). Search for the new code, or scroll the list and highlight the code in the Maintain Suppliers window.
Complete the mandatory fields and any other details required. Click Save to commit the changes to the tables.