Working with Segments
Segments can be created manually, downloaded from Smartpoint, downloaded from Calypsonet, or produced from a Quick Trip. Itineraries are created from Segment entries and Statement of Account, Quotations and Vouchers source segment detail.
Not all screens are covered in this module however, the process for completing the screen follows the same principle, regardless of the fields required. Also; see Module 5, Trip file -Auto Order of Segments.
Creating Manual Segments
To manually create a Segment:
- Highlight the Segment tab and click the New icon (Ctrl+N) on the standard toolbar. The New Segment Type window will open, providing a list of segments types that can be created. See "Inserting a Segment" in Module 5: Trip File.
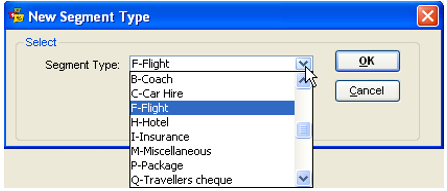
- Select the type required from the list and click OK.
- The Segment Input screens will vary, to reflect the information required for the type of segment selected. (e.g. an Insurance segment will ask for the Plan Type, a Travellers Cheque Segment will ask for the Currency).
- Web segments cannot be created manually they can only be downloaded from the host system.
- Flights departing early morning may require a check-in the previous day. The flight segment screen in CCTE has been enhanced to accommodate an additional field for a Check-in Date which will also appear in itinerary style 4.
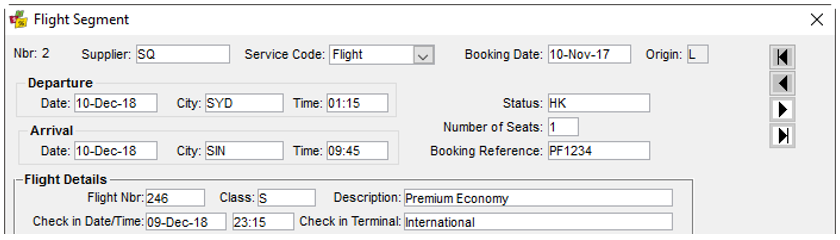
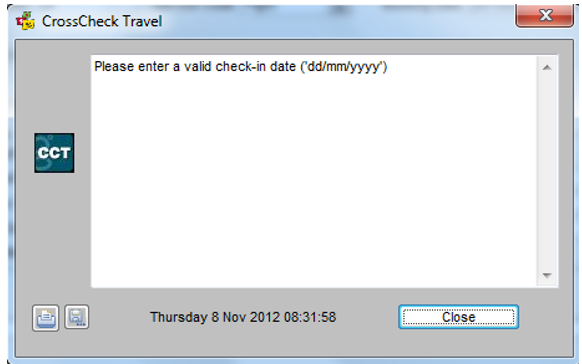
The check in date format is dd/mm/yyyy. If the date is entered in another format CCTE prompts this error message when tabbing from the field.
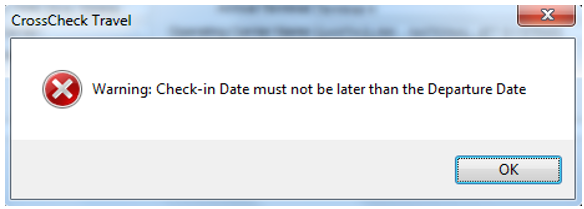
If the check-in date entered is later than the departure date, CCTE prompts an error message when the user tabs out of the field.
- Flight Class descriptions will automatically populate if the Class entered exists in the Flight Class Codes table.
- When completing all segment input screens:
- Remember to tab to move forward between fields and Shift+Tab to move backwards.
- If unsure of the entry required, press the F12 key and select from the list.
- There are no mandatory fields in Segment screens, so enter as many fields as required and tab past others.
- The Comments field is a free text format and will print on the itinerary. Extra lines can be added by pressing Ctrl+N or by clicking on the New button on the standard toolbar.
- When complete, the entry is transformed into a one-line summary under the Segment tab. The details entered are displayed in the lower part of this screen.
Note: With a Trip file open, from Tools a drop down menu will be available.
- If working in Segments Tab the option to Insert Segment will blacken so this item can be selected
- If the Client tab is open, Trip Link will become black so a trip can be linked from this option
- Quote Maintenance will show as black and this is used where a Duplicate Quote is contained within the Trip file, see Duplicate Quotes.
Adding Comments
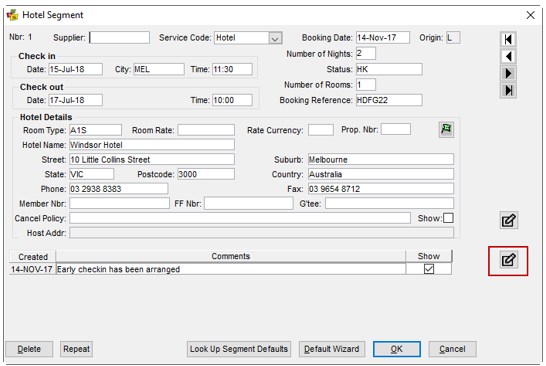
To access the Comments section of a Segment, click on the View/Edit Itinerary Comments button.
The segment comment screen will open for any information to be loaded. Multiple comments can be added per segment or they can be entered in to the 1 comment field.
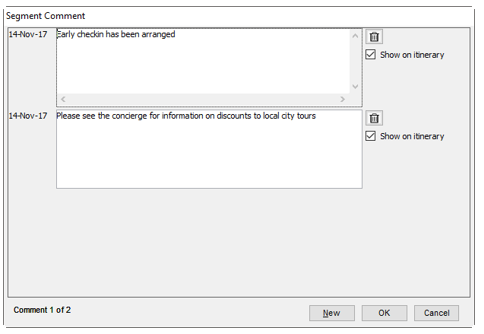
These comments can also be removed from appearing on itineraries by unticking the Show on itinerary box.

To delete the comment, simply click on the trashcan button. Then click OK.

Adding Cancellation Policies
To access the Cancellation Policy section for an individual Segment, click on the View/Edit Cancel Policy button.
The Cancel Policy screen will open for the cancellation policy data to be loaded.
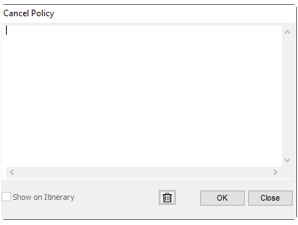
These comments can also be removed from appearing on itineraries by unticking the Show on itinerary box.

To delete the comment, simply click on the trashcan button. Then click OK.

Passive Hotel Segments with MK Status
Hotel passive segment action code of "MK" and mandatory fields is available for Travelport Travelport+ customers. The existing "BK" passive segment can be created, only after an active hotel segment or the new "MK" passive segment has been created in a PNR.
The Viewpoint script is required to book the Passive Hotel Segment with MK status. CCTE download will only support the format of the Passive Hotel from this script.
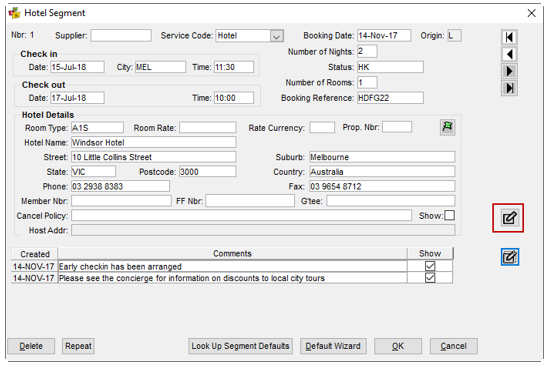
Download booking into CCTE when complete and the Hotel segment will appear in the Trip file similar to the below example.
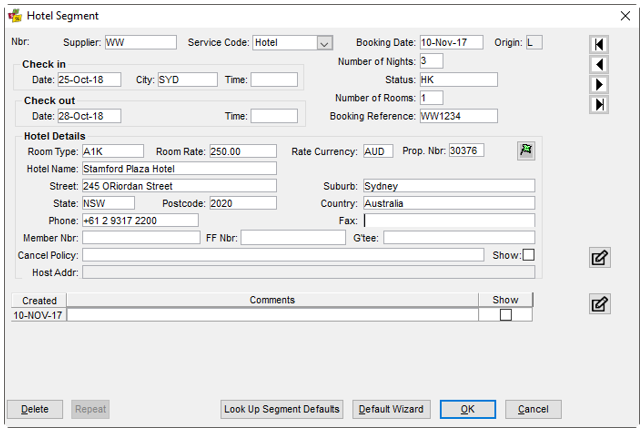
Moving between segments can be done by using the arrow buttons in the top right corner of the segment screen.
Service Codes
Service Codes can be defined by a User who has access rights to the Service Type Table.
See CCTE Finance User Guide.
A Service Code can be associated to a Service Type to more accurately describe the service being provided.
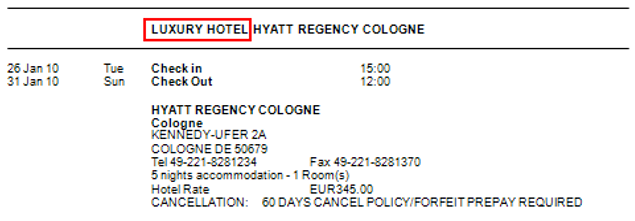
When a new segment is created e.g. Hotel, the new Service Code field will appear in the Segment. This will default to the Segment Type but a dropdown list is available with the Service Codes that have been created. In this example sub categories have been created for Hotel: Resort, Luxury Hotel, Backpackers etc.
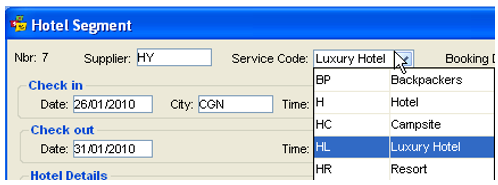
After selection of a Service Code, it will appear on an itinerary.
Changing Existing Segments
Any previously created segments can be updated by double clicking anywhere in a summary line. Make any changes required, and Save over previous entries by clicking OK.
Flight Segment

Enter as many fields as possible, including a carrier record locator in the Booking Reference field.
The ![]() button provides access to a second screen where any special information and services required on the flight segment can be entered.
button provides access to a second screen where any special information and services required on the flight segment can be entered.
When a booking is downloaded from Travelport+, this screen is completed automatically as per the booking, and the service details included in the respective segments as input by the airlines.
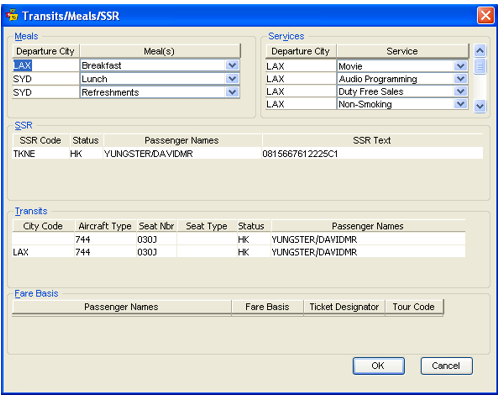
This area will be populated from the information downloaded from Smartpoint, and you can make additions to this screen.
If known, provide the Meals and Services offered on the flight. If special requests have been made, enter the corresponding Travelport+ SSR code, status and details (the status and code can be accessed using the F12 key or by double clicking the field).
Click OK to save these details. To Save the flight segment, click OK.
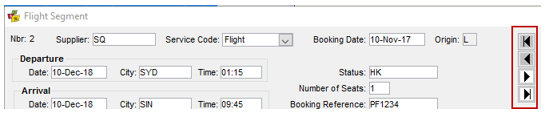
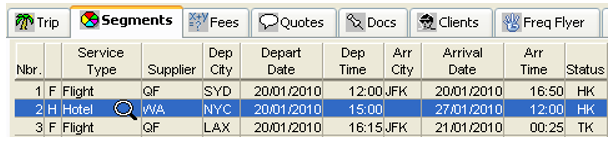
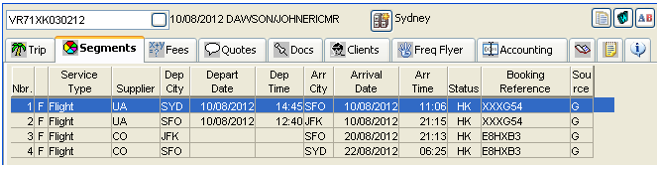
For transit segments, where there is a stop during the flight which involves a flight number change, an aircraft change or both, CCTE will create two segments within the segments tab to reflect the arrival and departure information for each leg of the flight. For example, here is a PNR with two transit segments:
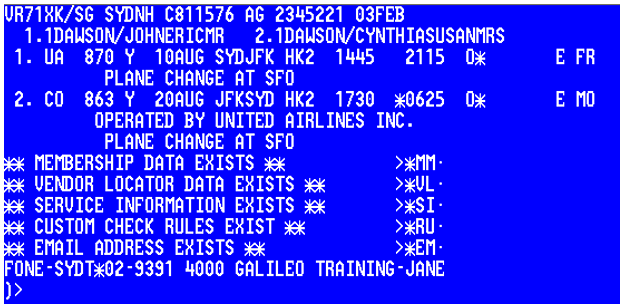
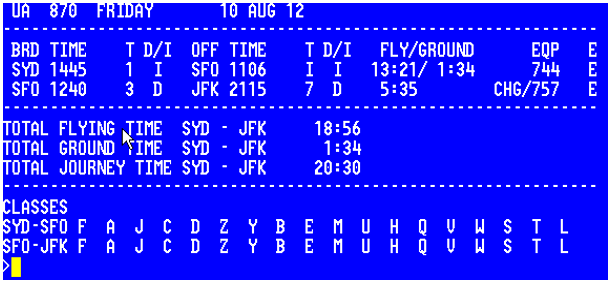
For reference, here is the details segment information in Travelport+ Host displaying the information regarding the two legs of segment one:
This is the trip file created by downloading this same PNR. For each leg, there is a segment showing in the Segments tab.
NDC Bookings
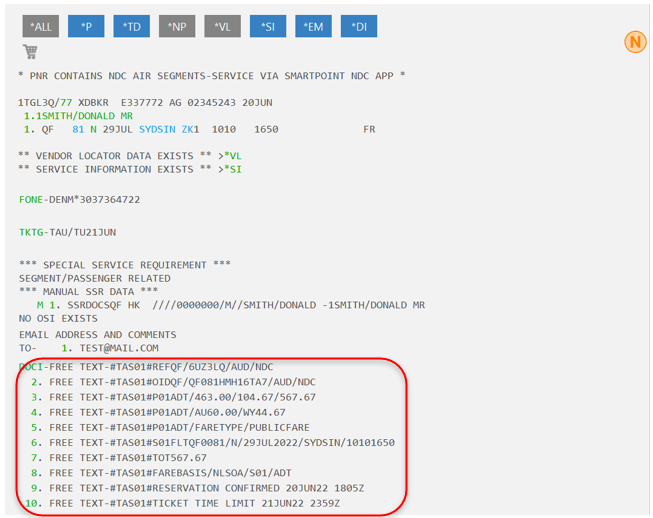
Bookings made through an NDC Channel create PNRs in Smartpoint and these can be imported into CCTE by the standard Booking File Import process. However there are some key differences to how the NDC Bookings display and are created into CCTE.
- The
 symbol displays at the top of the Smartpoint Booking screen:

- Currently an NDC Bookings needs to consist only of NDC Segments
- Fare Details per Passenger and Ticketing information is presented within DI Lines in the Bookings. The CCTE Import process for NDC Bookings reads the DI Line information to create Quotes and Tickets in the Trip Files.
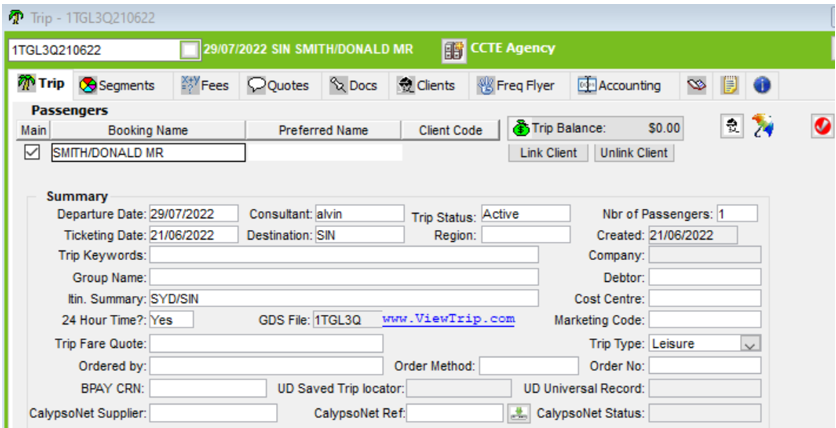
Records created in CCTE for NDC Bookings:
TRIPS
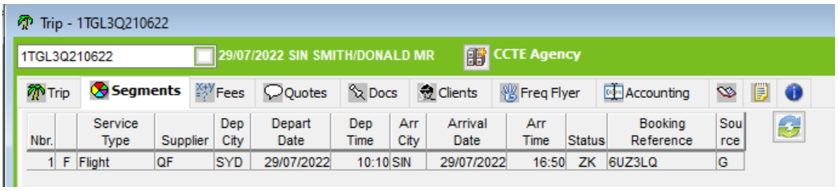
SEGMENTS
QUOTES
Cruise Segment
A Cruise segment input screen provides a Cruise Details area to record the name of the vessel, Cruise number, and Cabin or Berth that has been booked for the passenger.
Complete as many other fields as is possible. Double click (F12) on the Supplier field to access a list of available Cruise suppliers.
Any additional comments associated with the cruise segment can be added into the Comments field. Click OK to save the segment.
Tour Segment
The Tour segment input screen contains general information about any tours that have been booked for the passenger. If multiple tour segments are to be included in the one Trip file, the tour name can be added after the booking reference.
Hotel Segment
The detail entered in segments will print in the itinerary, including the guarantee, membership numbers and cancel policy. When a Room Rate is entered on this screen, it is transposed into the itineraries and used for Hotel Commission tracking calculations. The list attached to the Room Type field includes condominiums, apartments and room rate inclusions.