Skip To:
- Adding a Second Passport
- Adding Visa Information
- Deleting a Passport
- Deleting a Visa
- Advanced Users Tip
The Passport tab is used to store the client’s Passport and visa details. Take the following steps to complete:
Click on the Passport tab then on the New icon on the toolbar or press CTRL+N to access the passport and visa input screen. The blue colour indicates the mandatory fields that must be completed before this information can be saved.
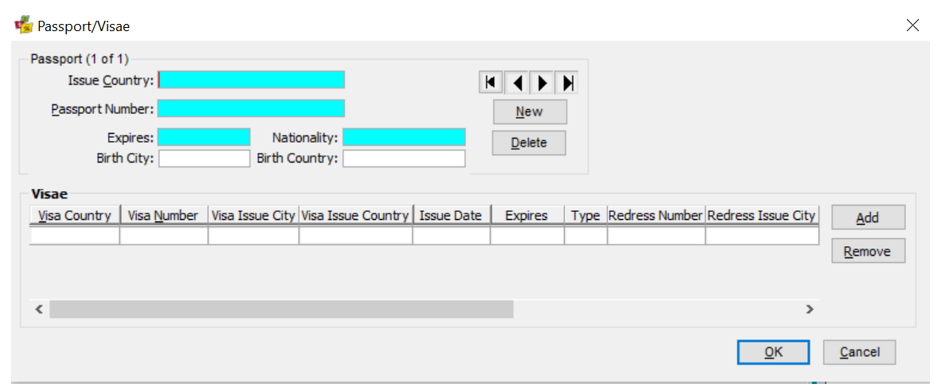
- Enter the Country reflected as the Passport Nationality in the Country field or use the F12 key and select from the list.
- Type the Passport Number in the next field.
- Complete the Expires field with the Expiry date shown in the passport
- Enter the date in the following format: Day/Month/Year, e.g. 31/10/09
- Add Nationality filed (this is picked up from Country/Consulate Table)
- Add Birth City and Birth Country, if applicable (not mandatory)
- Click on OK to save your entry and close the input screen.
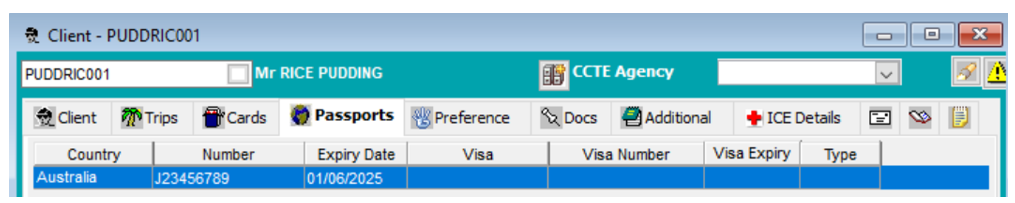
Passport details are uploaded into Smartpoint when these details are completed as an SI field.
Adding a Second Passport
Some travellers have more than one passport.
Click anywhere on the closed passport entry to re-open the input screen,
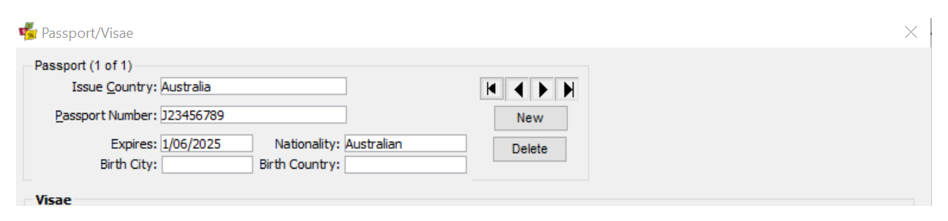
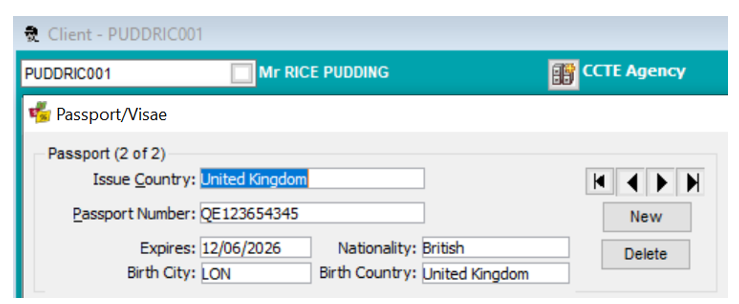
Click on the New button to add information about a second passport.
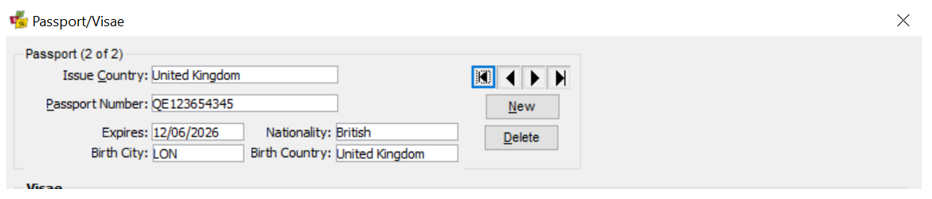
View the passport entries using the arrow buttons.
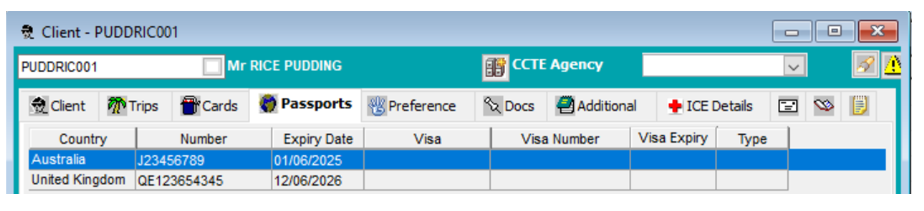
Adding Visa information
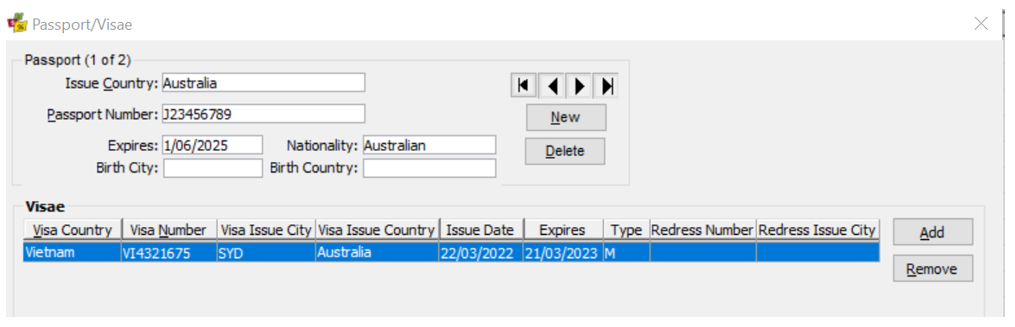
The visa is attached to the passport. If more than one passport is recorded in the system, use the arrows to make sure the correct passport is displayed in order to attach the visas.
Take the following steps to complete:
- Enter the country name in the Visa Country field
- Type the Visa Number
- Enter Visa Issue City, e.g.. SYD
- Enter Visa Issue Date, e.g.. 07/03/11
- Complete the Expires field using the following format: Day/Month/Year, e.g. 07/10/11
- Click in the Type field and press F12 to select the type of visa required
- If applicable, add Visa Redress Number (not mandatory)
- If applicable, add Visa Redress Issue City (not mandatory)
- If only entering one visa, click on OK
- If entering multiple visas click on the Add button, enter the additional visa information
- Click OK to save once all visas have been entered
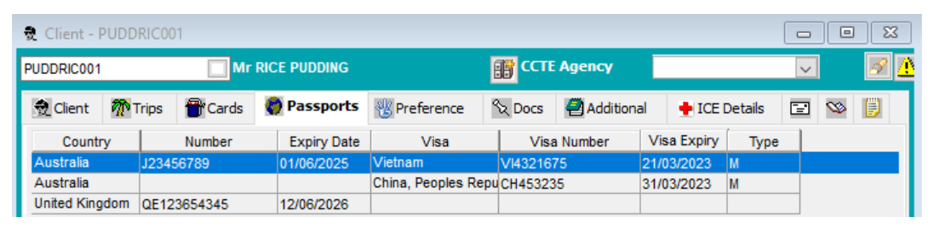
- The summary screen details all Passports and visas entered for the client
If additional Visa information is to be added, click on Add button and complete all fields as above
Completed screen with Passport and Visa data will be available, including expired passport data if it has not previously been deleted:
To access the Passport or Visa information to edit or delete, double click on the appropriate line on the Passport tab.
Deleting a Passport
Position the cursor on the appropriate passport line and double click to open the dialogue window.
Ensure the correct Passport is displayed on the screen, using the arrows to scroll through the entries, and click the Delete button.
A dialogue box will appear to confirm the deletion, click Yes to delete or No to cancel the action.
When a passport is deleted, all attached visa entries are also deleted.
Deleting a Visa
To delete a visa entry, open the input screen by double clicking on the appropriate passport under the Passport tab then follow the simple steps:
- Highlight the visa from the list that is to be deleted
- Click on the Remove Button

- A dialogue box will appear to confirm the deletion, click on Yes
- Click OK to return to the Passport tab
Advanced Users Tip
If a client is being accompanied by another passenger and you do not wish to create a Client file for the companion, try the suggestion below.
Add the accompanying passenger’s passport details in the first client file, by adding a name after the passport number.
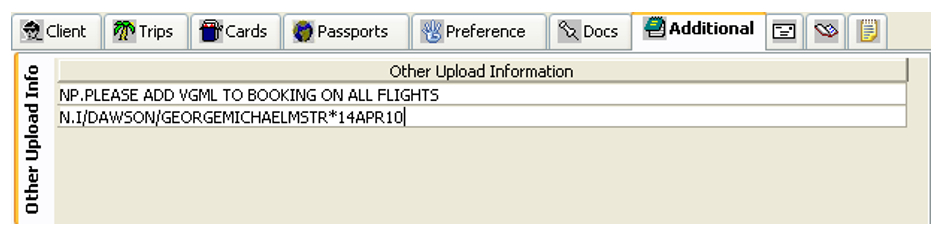
Enter the accompanying passenger’s name under the Other Upload Info in the Additional tab.