If multiple passengers’ information is to be uploaded in one upload; it is possible to do this by clicking on the “Add Client” button on Client Upload screen.

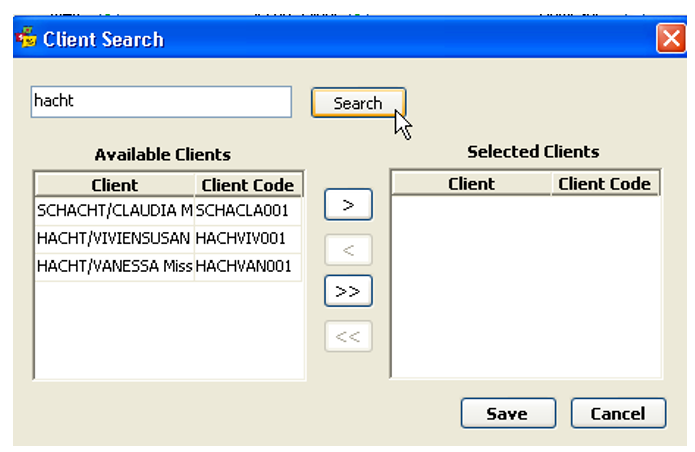
- Once “Add Client” button is clicked; “Client Search” Screen will open
- You are able to search by typing the complete client’s name or by using the wild card characters in the text box and click “Search”
Note: Similar names will appear in the search
Client Found: If the client is found then the name will be displayed under “Available Clients” and the Text box will clear so that a search may be done for another client if required.
- The Client file can be opened by double clicking on the record under “Available Clients”
If an attempt is made to add the same Client that has already been selected then a message will appear stating “The Client you are trying to add has been added, please check again.”
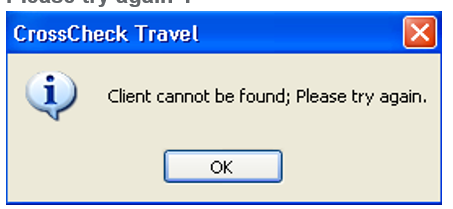
Client Not found: If no client is found then a message will pop up saying “Client cannot be Found; Please try again”.
Once the search is finished it is possible to move the clients from Available options to Selected Options or vice versa by clicking on the following buttons:
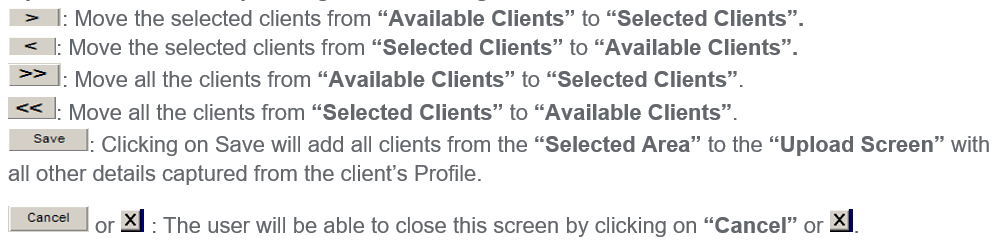
- Highlight name and Move Client across to right hand side
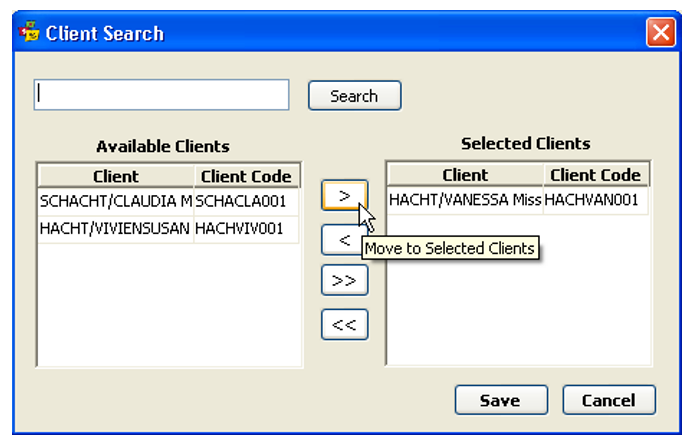
- Save
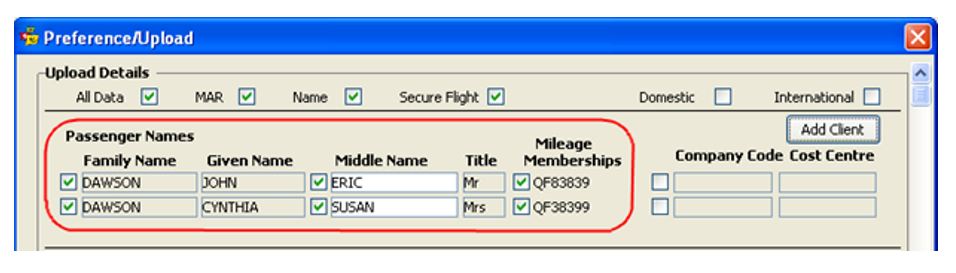
Names that have been moved across and all their details from their client files will display in the Upload screen, so it is important to ensure that the correct number of seats have been held in Host prior to upload.
When uploading multiple passengers with the same name, Smartpoint will only accept one entry per PNR for address details. It is not possible to add a physical address location for each passenger to be uploaded into a PNR.